Christy Miller – Oak Hill Millworks

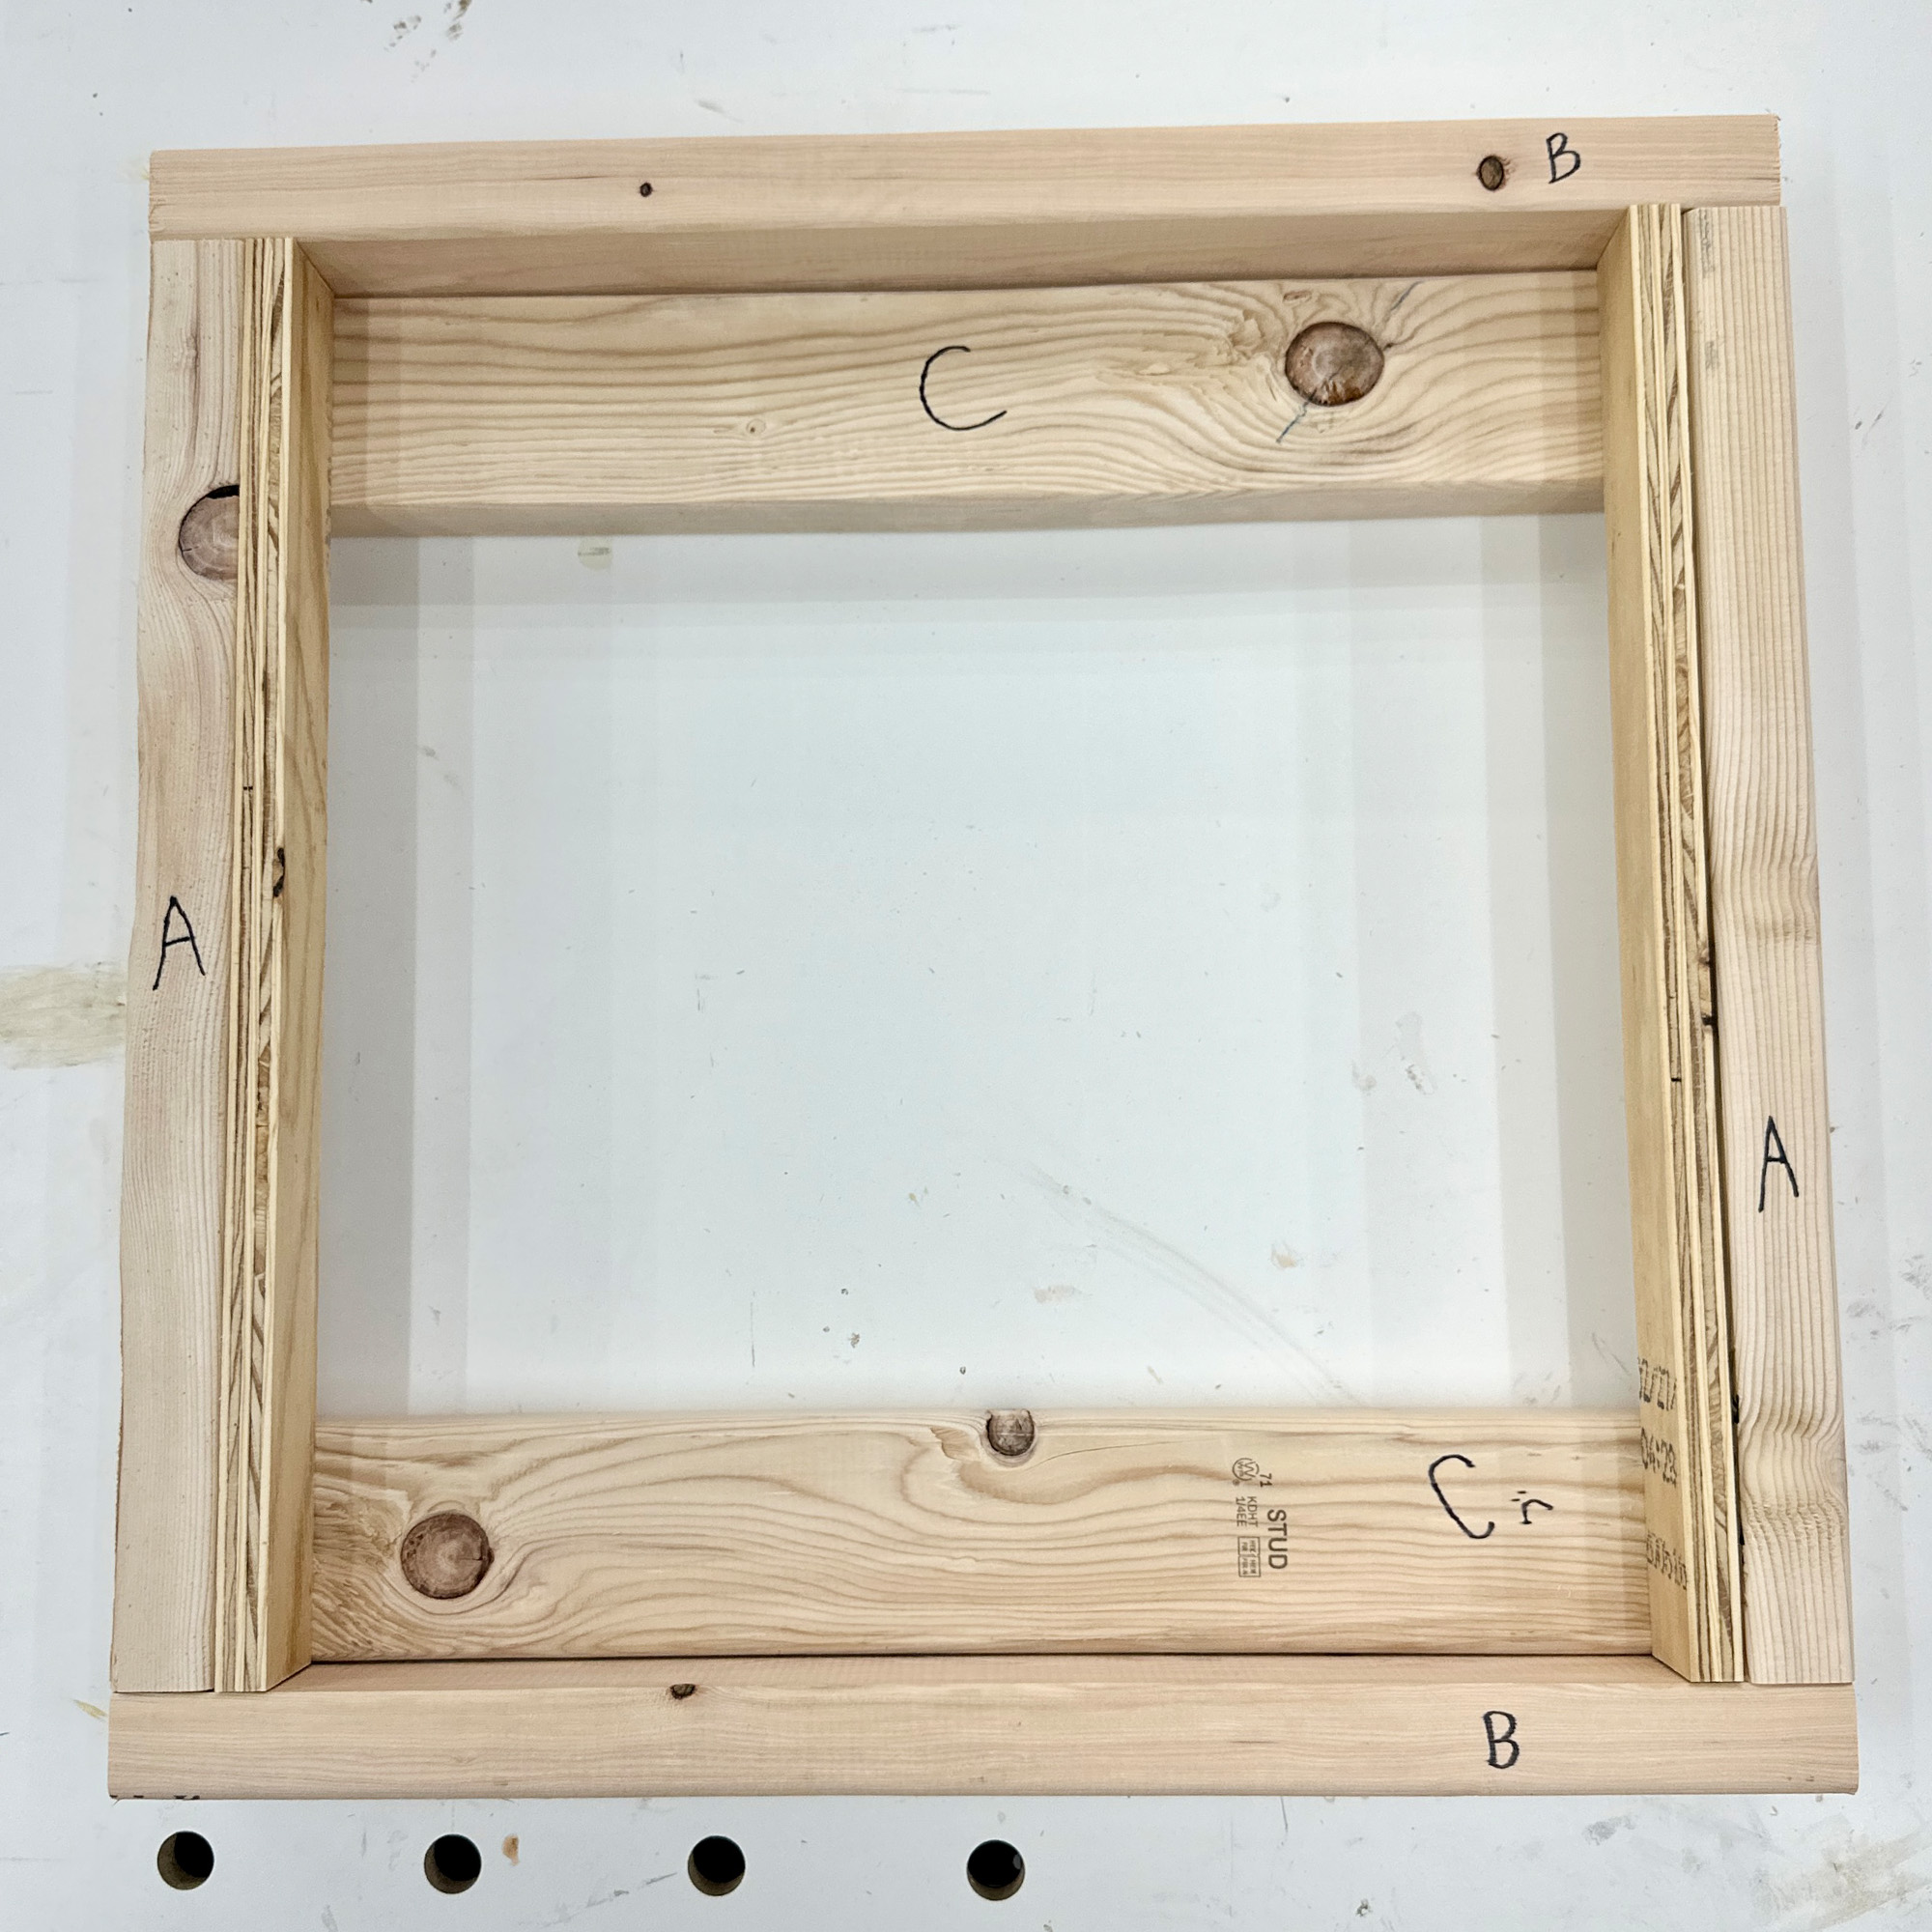
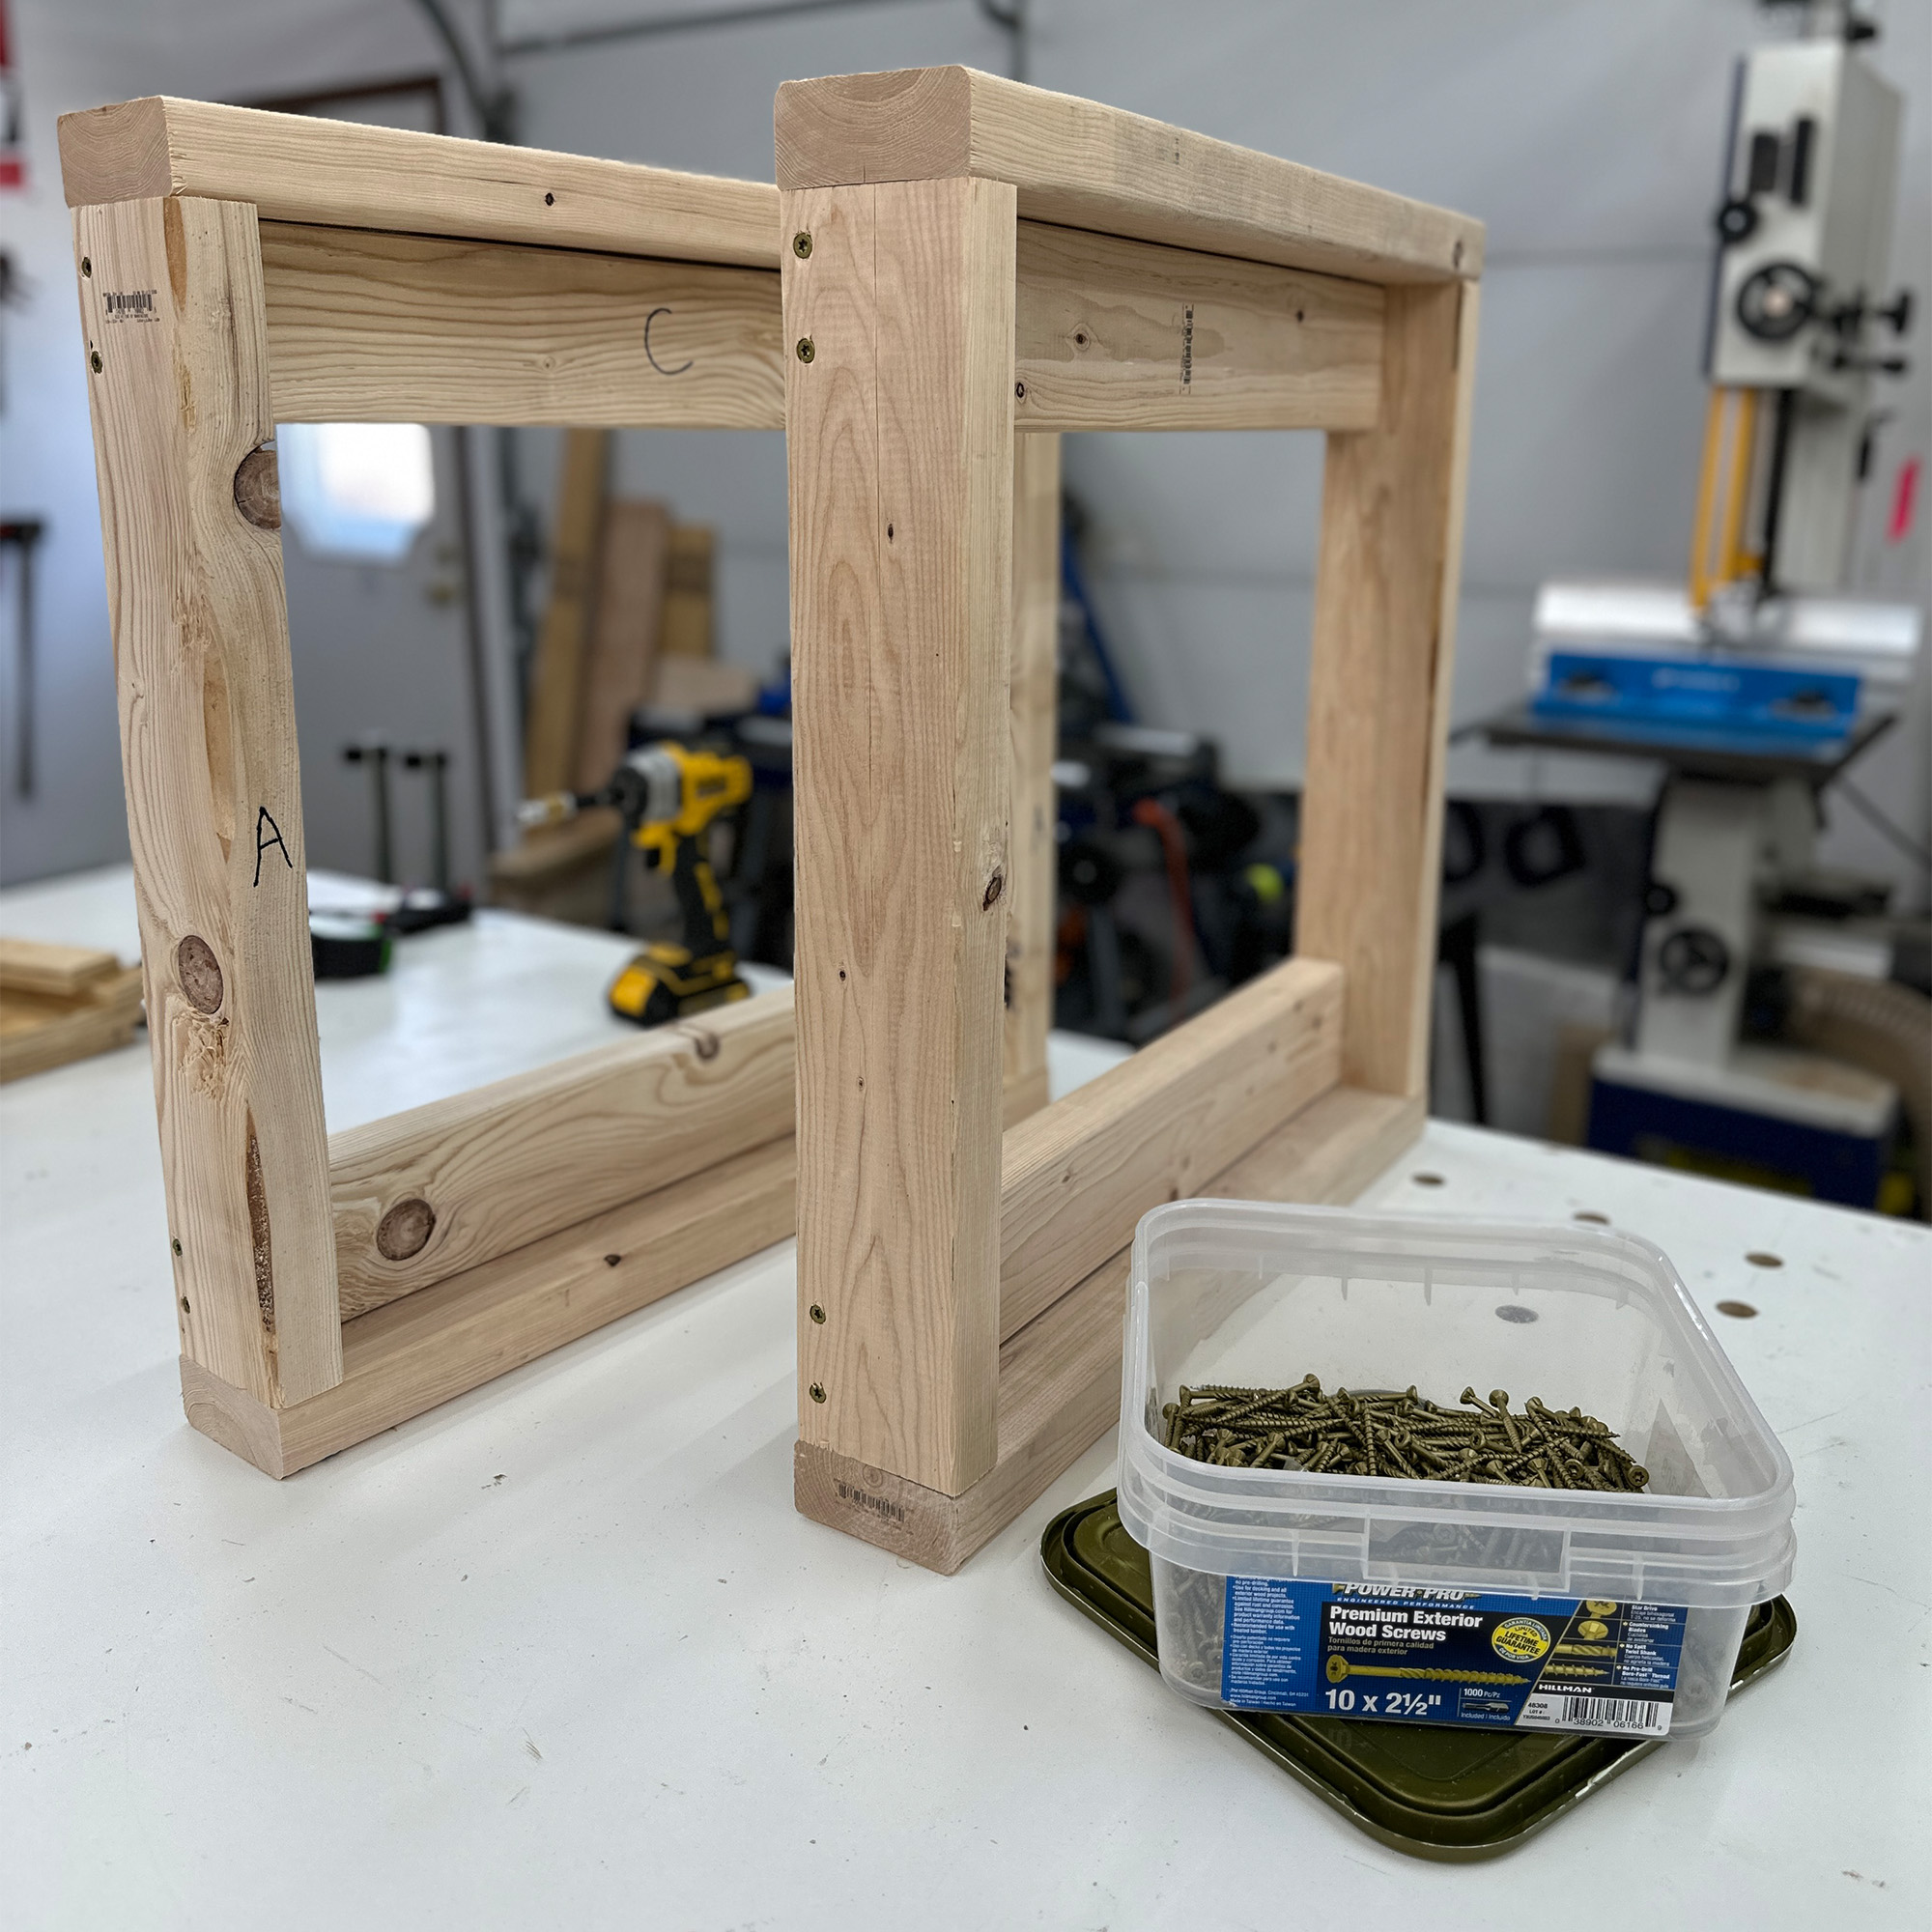
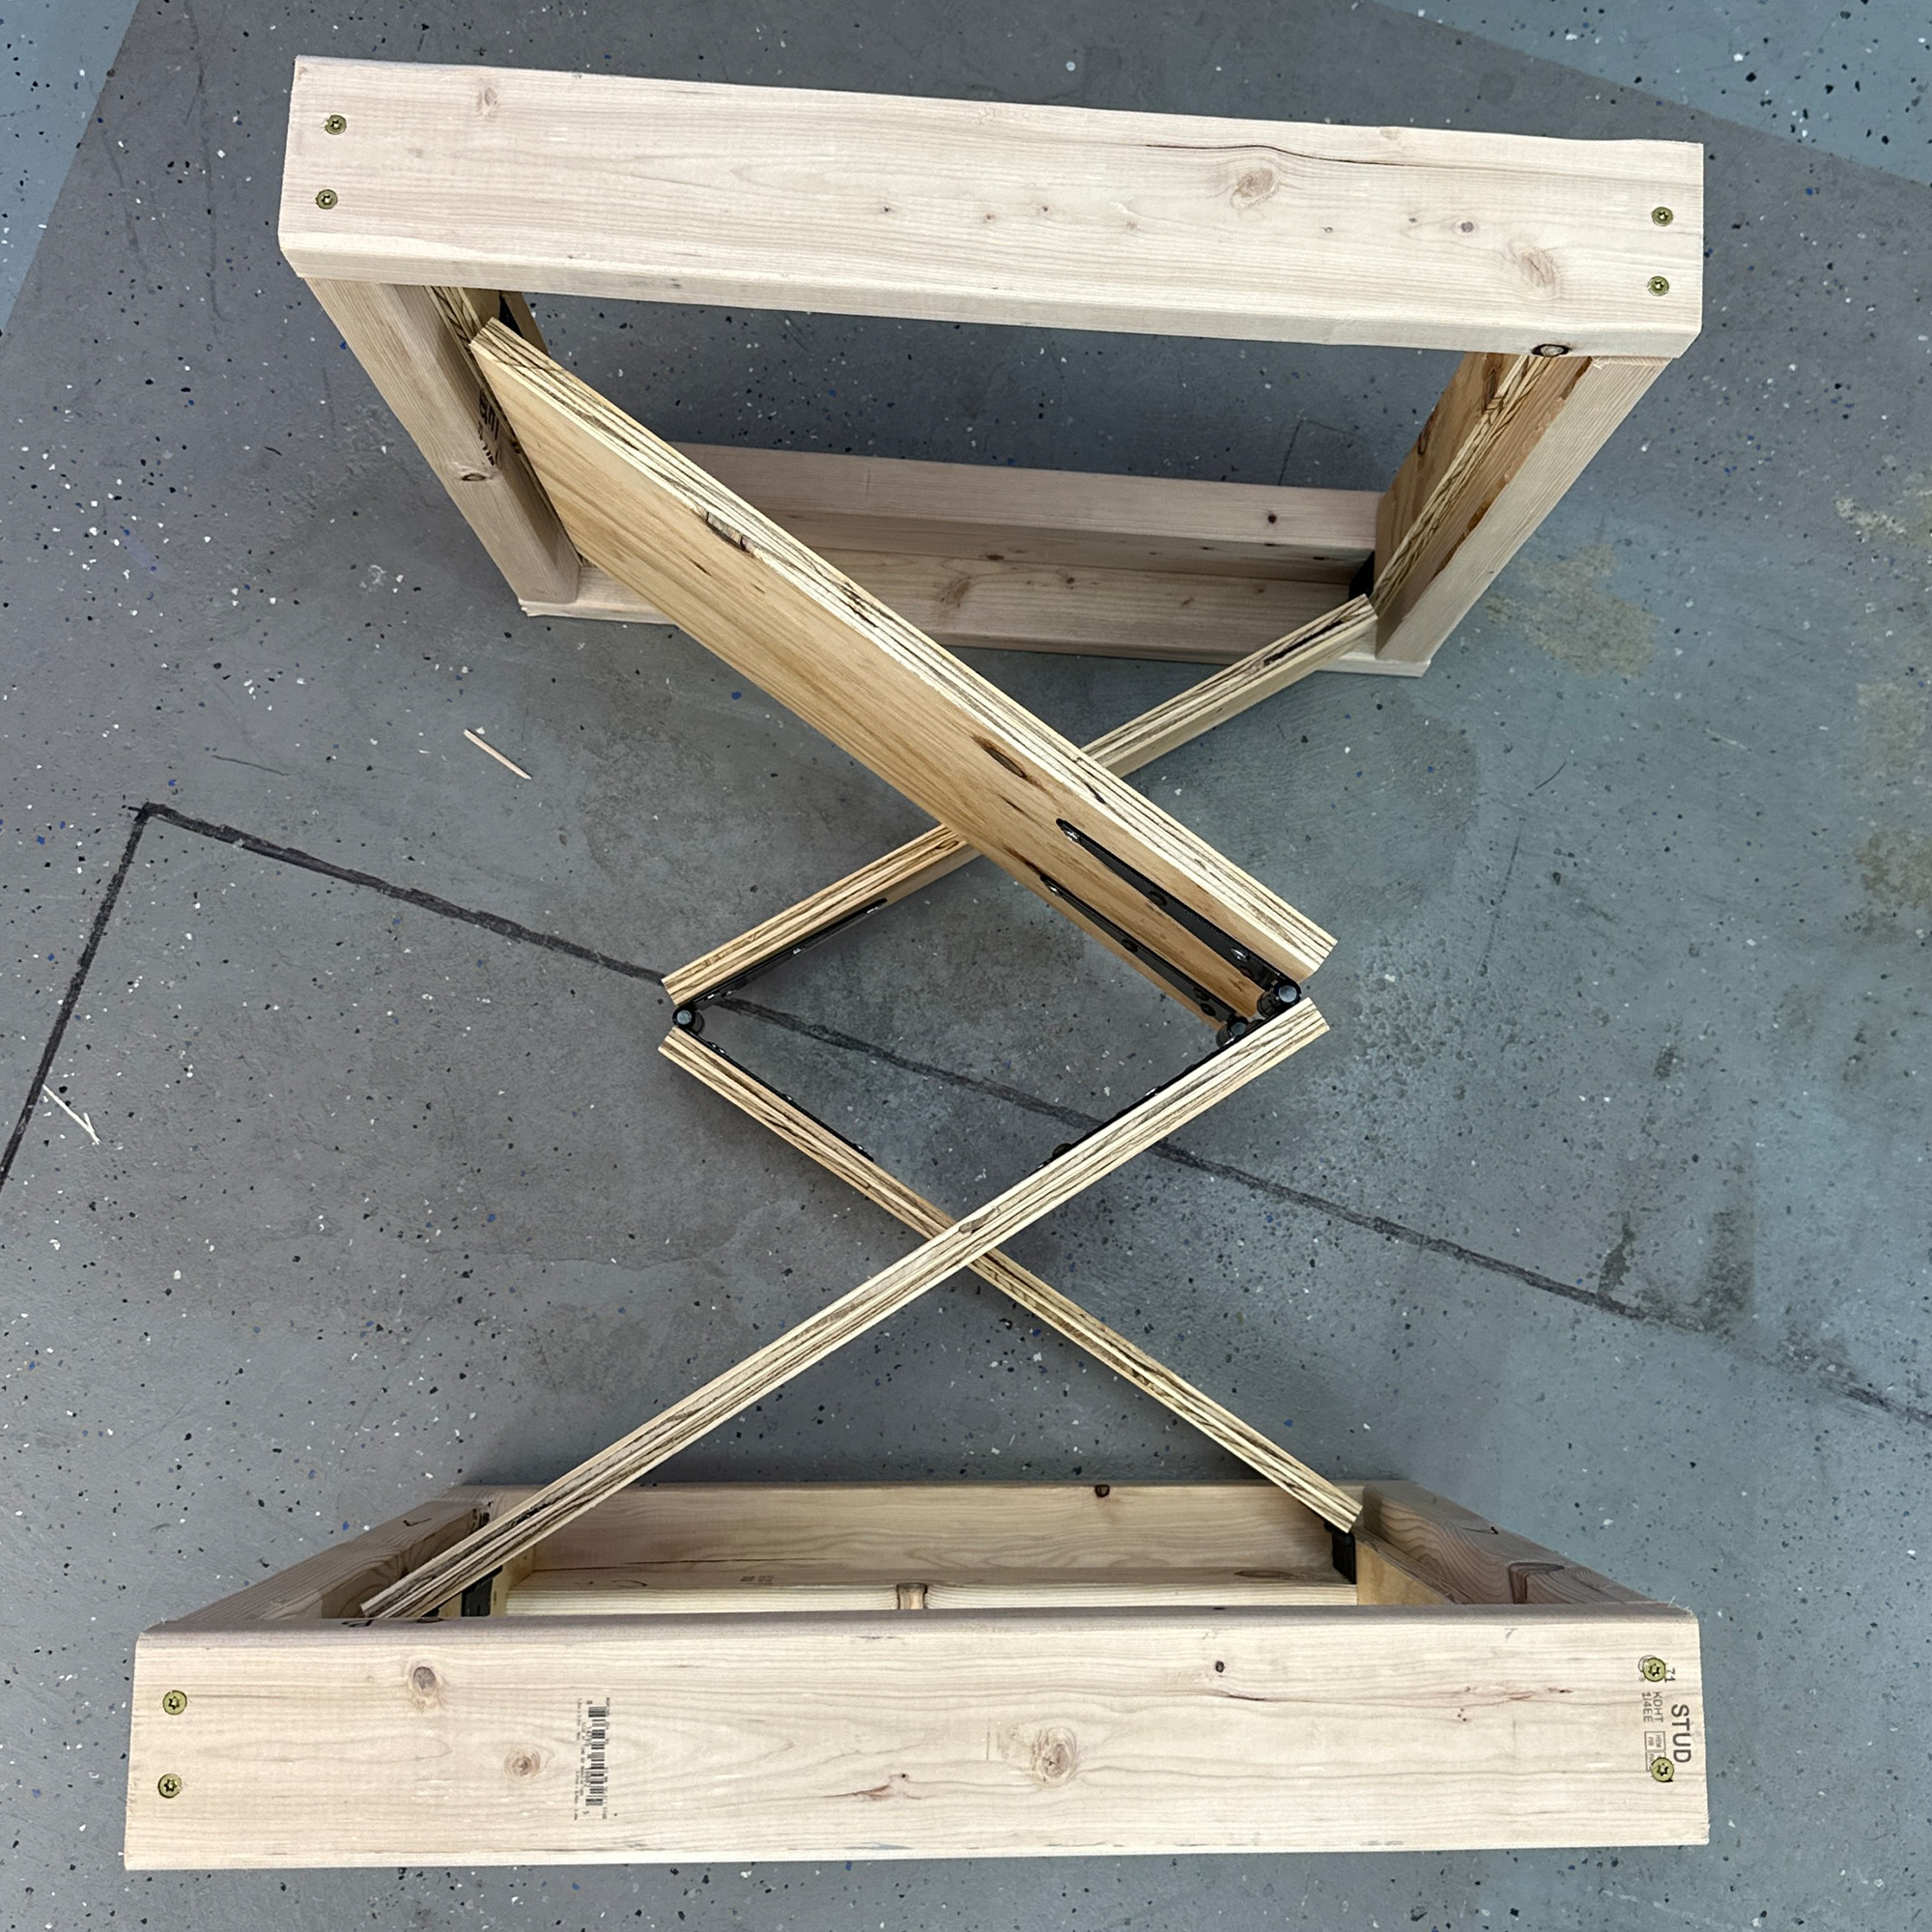
You’ll need to use your 2×4 Parts A-C and your plywood Part D to construct the two main parts of the workbench frame. Assembled, it will look similar to the above photo. Disclaimer: The frame construction plans were found in American Woodworker from 2007 and have been modified. I originally built my version of the workbench according to their plans and found it to be way too short, even with the optional casters. Modify it to suit your needs. Plans here will yield an overall workbench standing at 34-3/4” tall (without casters), 24” deep, and 44-3/4” wide.
You’ll use the 2-1/2” fasteners to assemble these parts, keeping in mind your screw placement as some areas have fasteners close together. I highly recommend pre-drilling your holes for fasteners as pine can be prone to cracking.

I used my bandsaw for this step but you could also use a flush trim saw and do it by hand easily. I tacked these in place with some 18g brad nails and fastened them on with drywall screws.


For this part, you can either use a table saw or the TrackSawGuide. I used my tables this time around because my circular saw has been acting up. Any chance to use the famous yellow PushStick! You’ll have almost a half sheet of plywood leftover from this project.
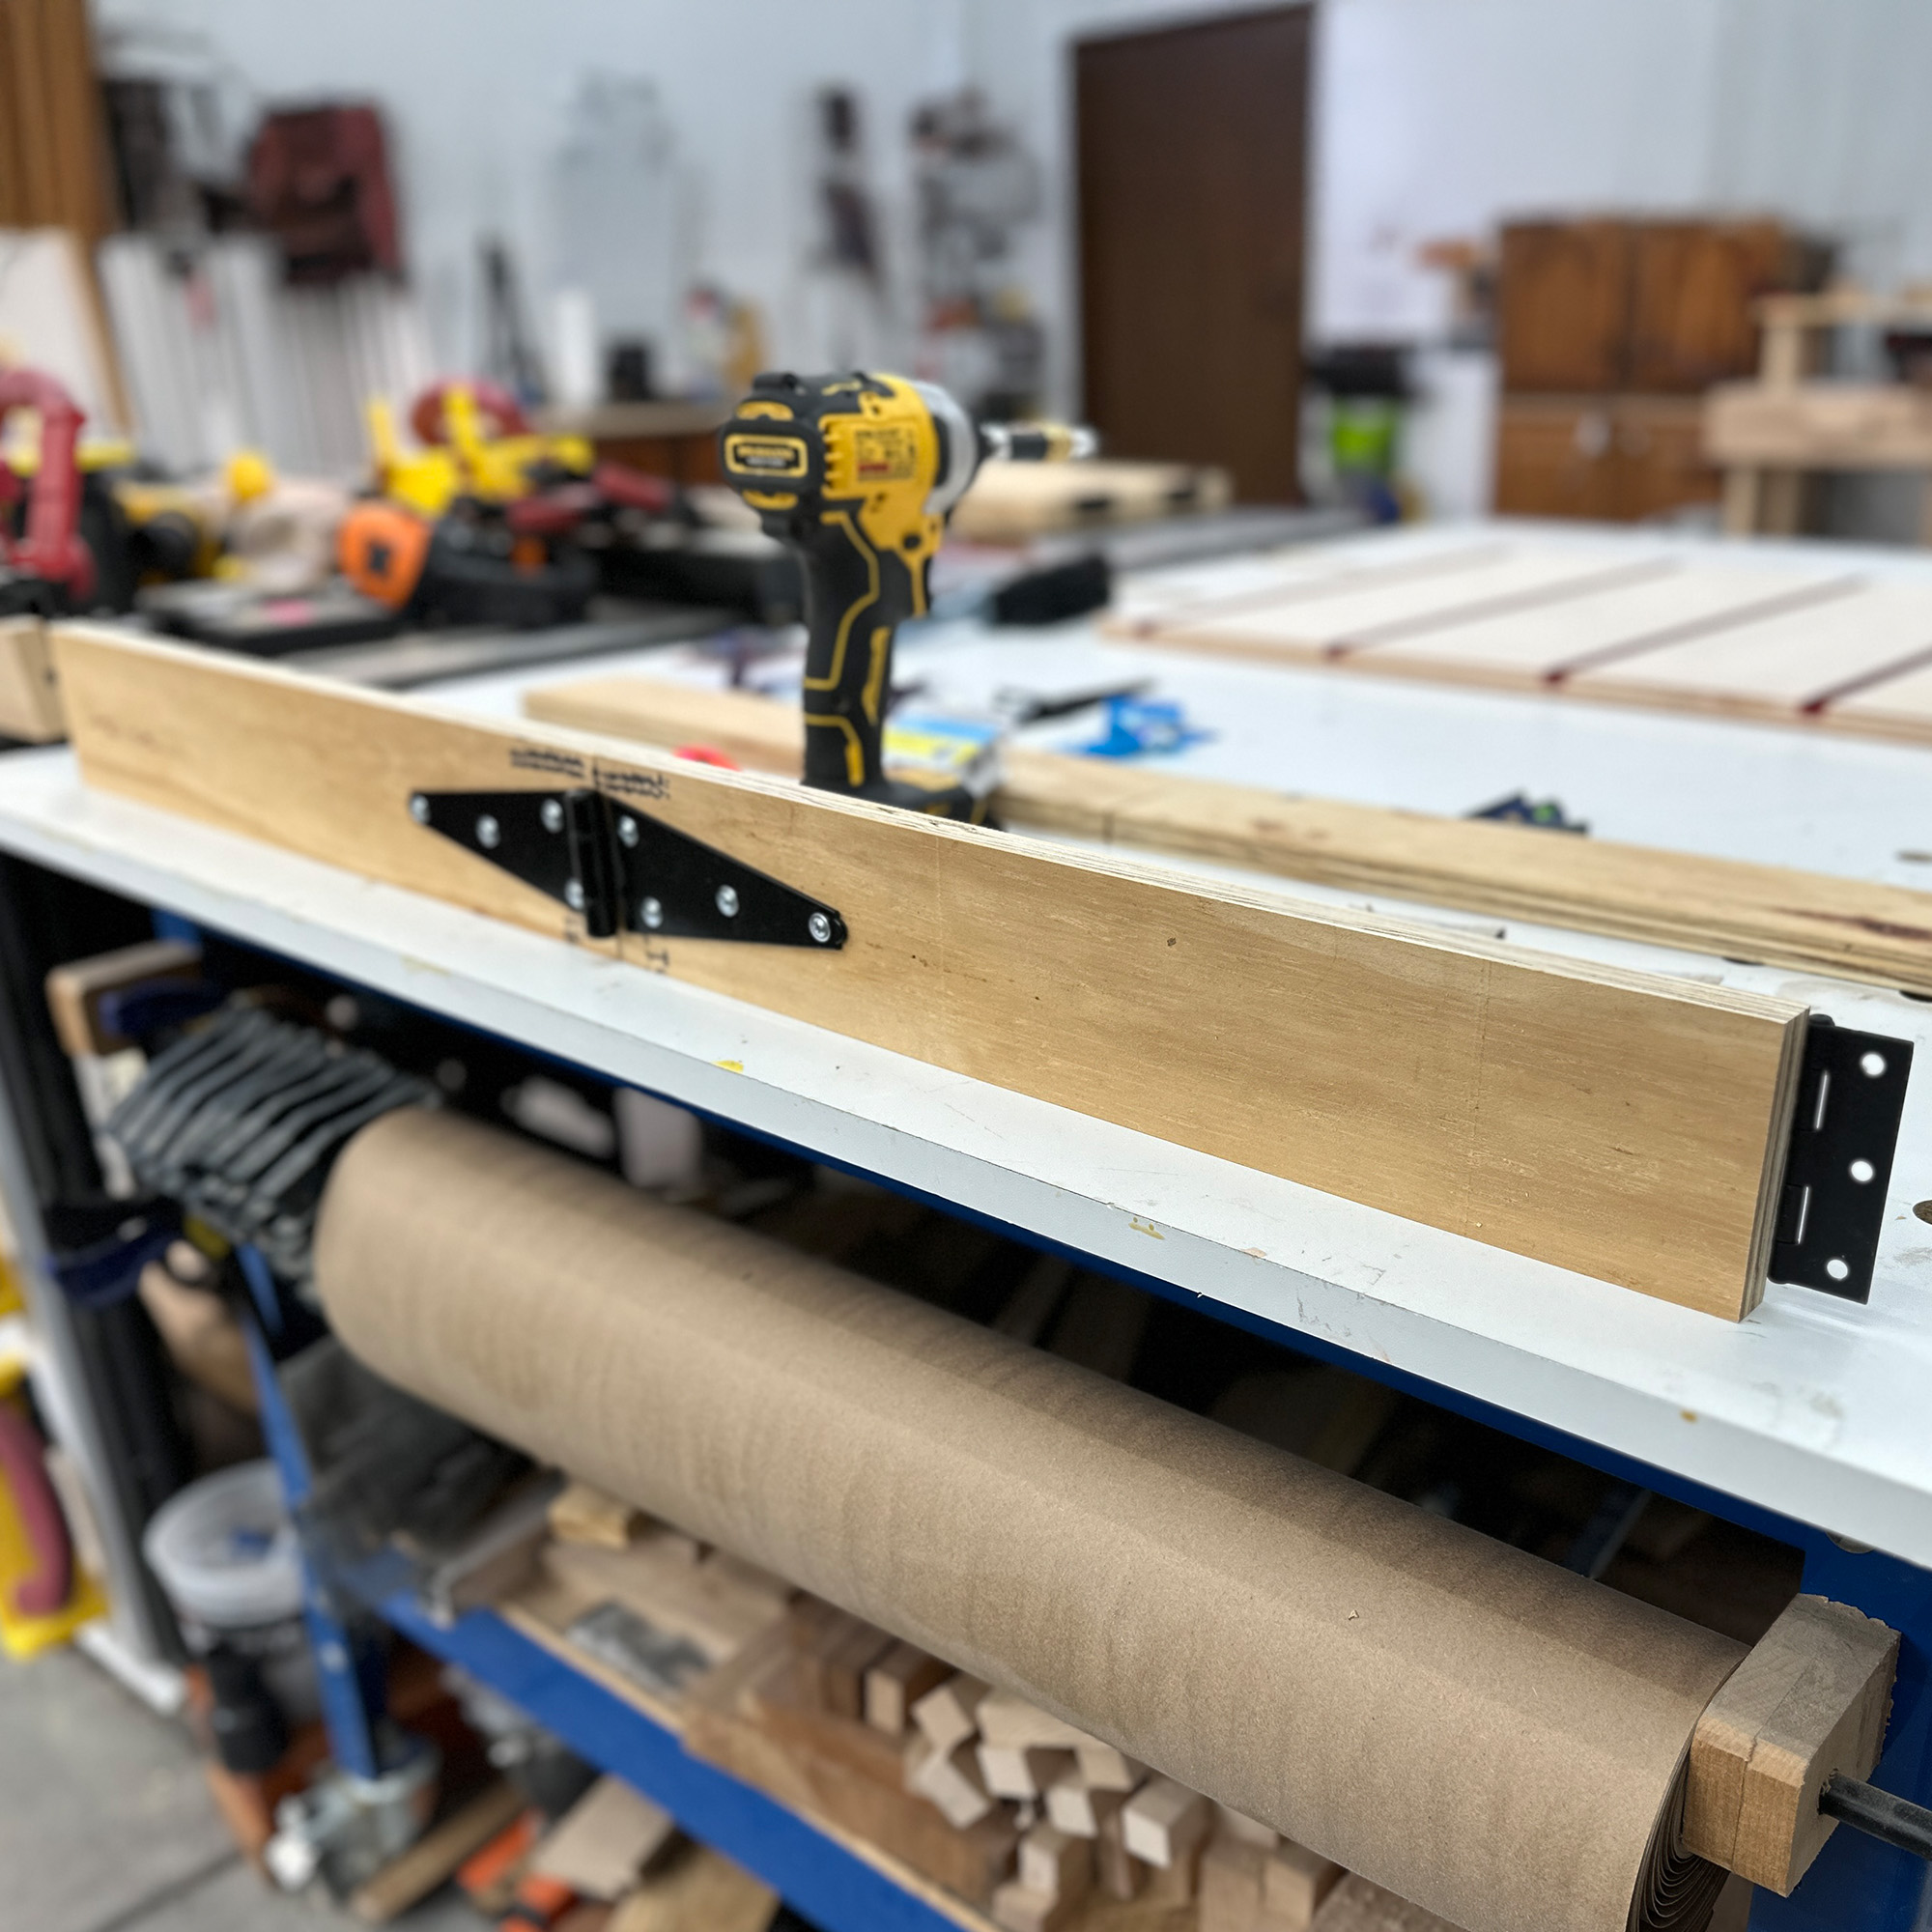
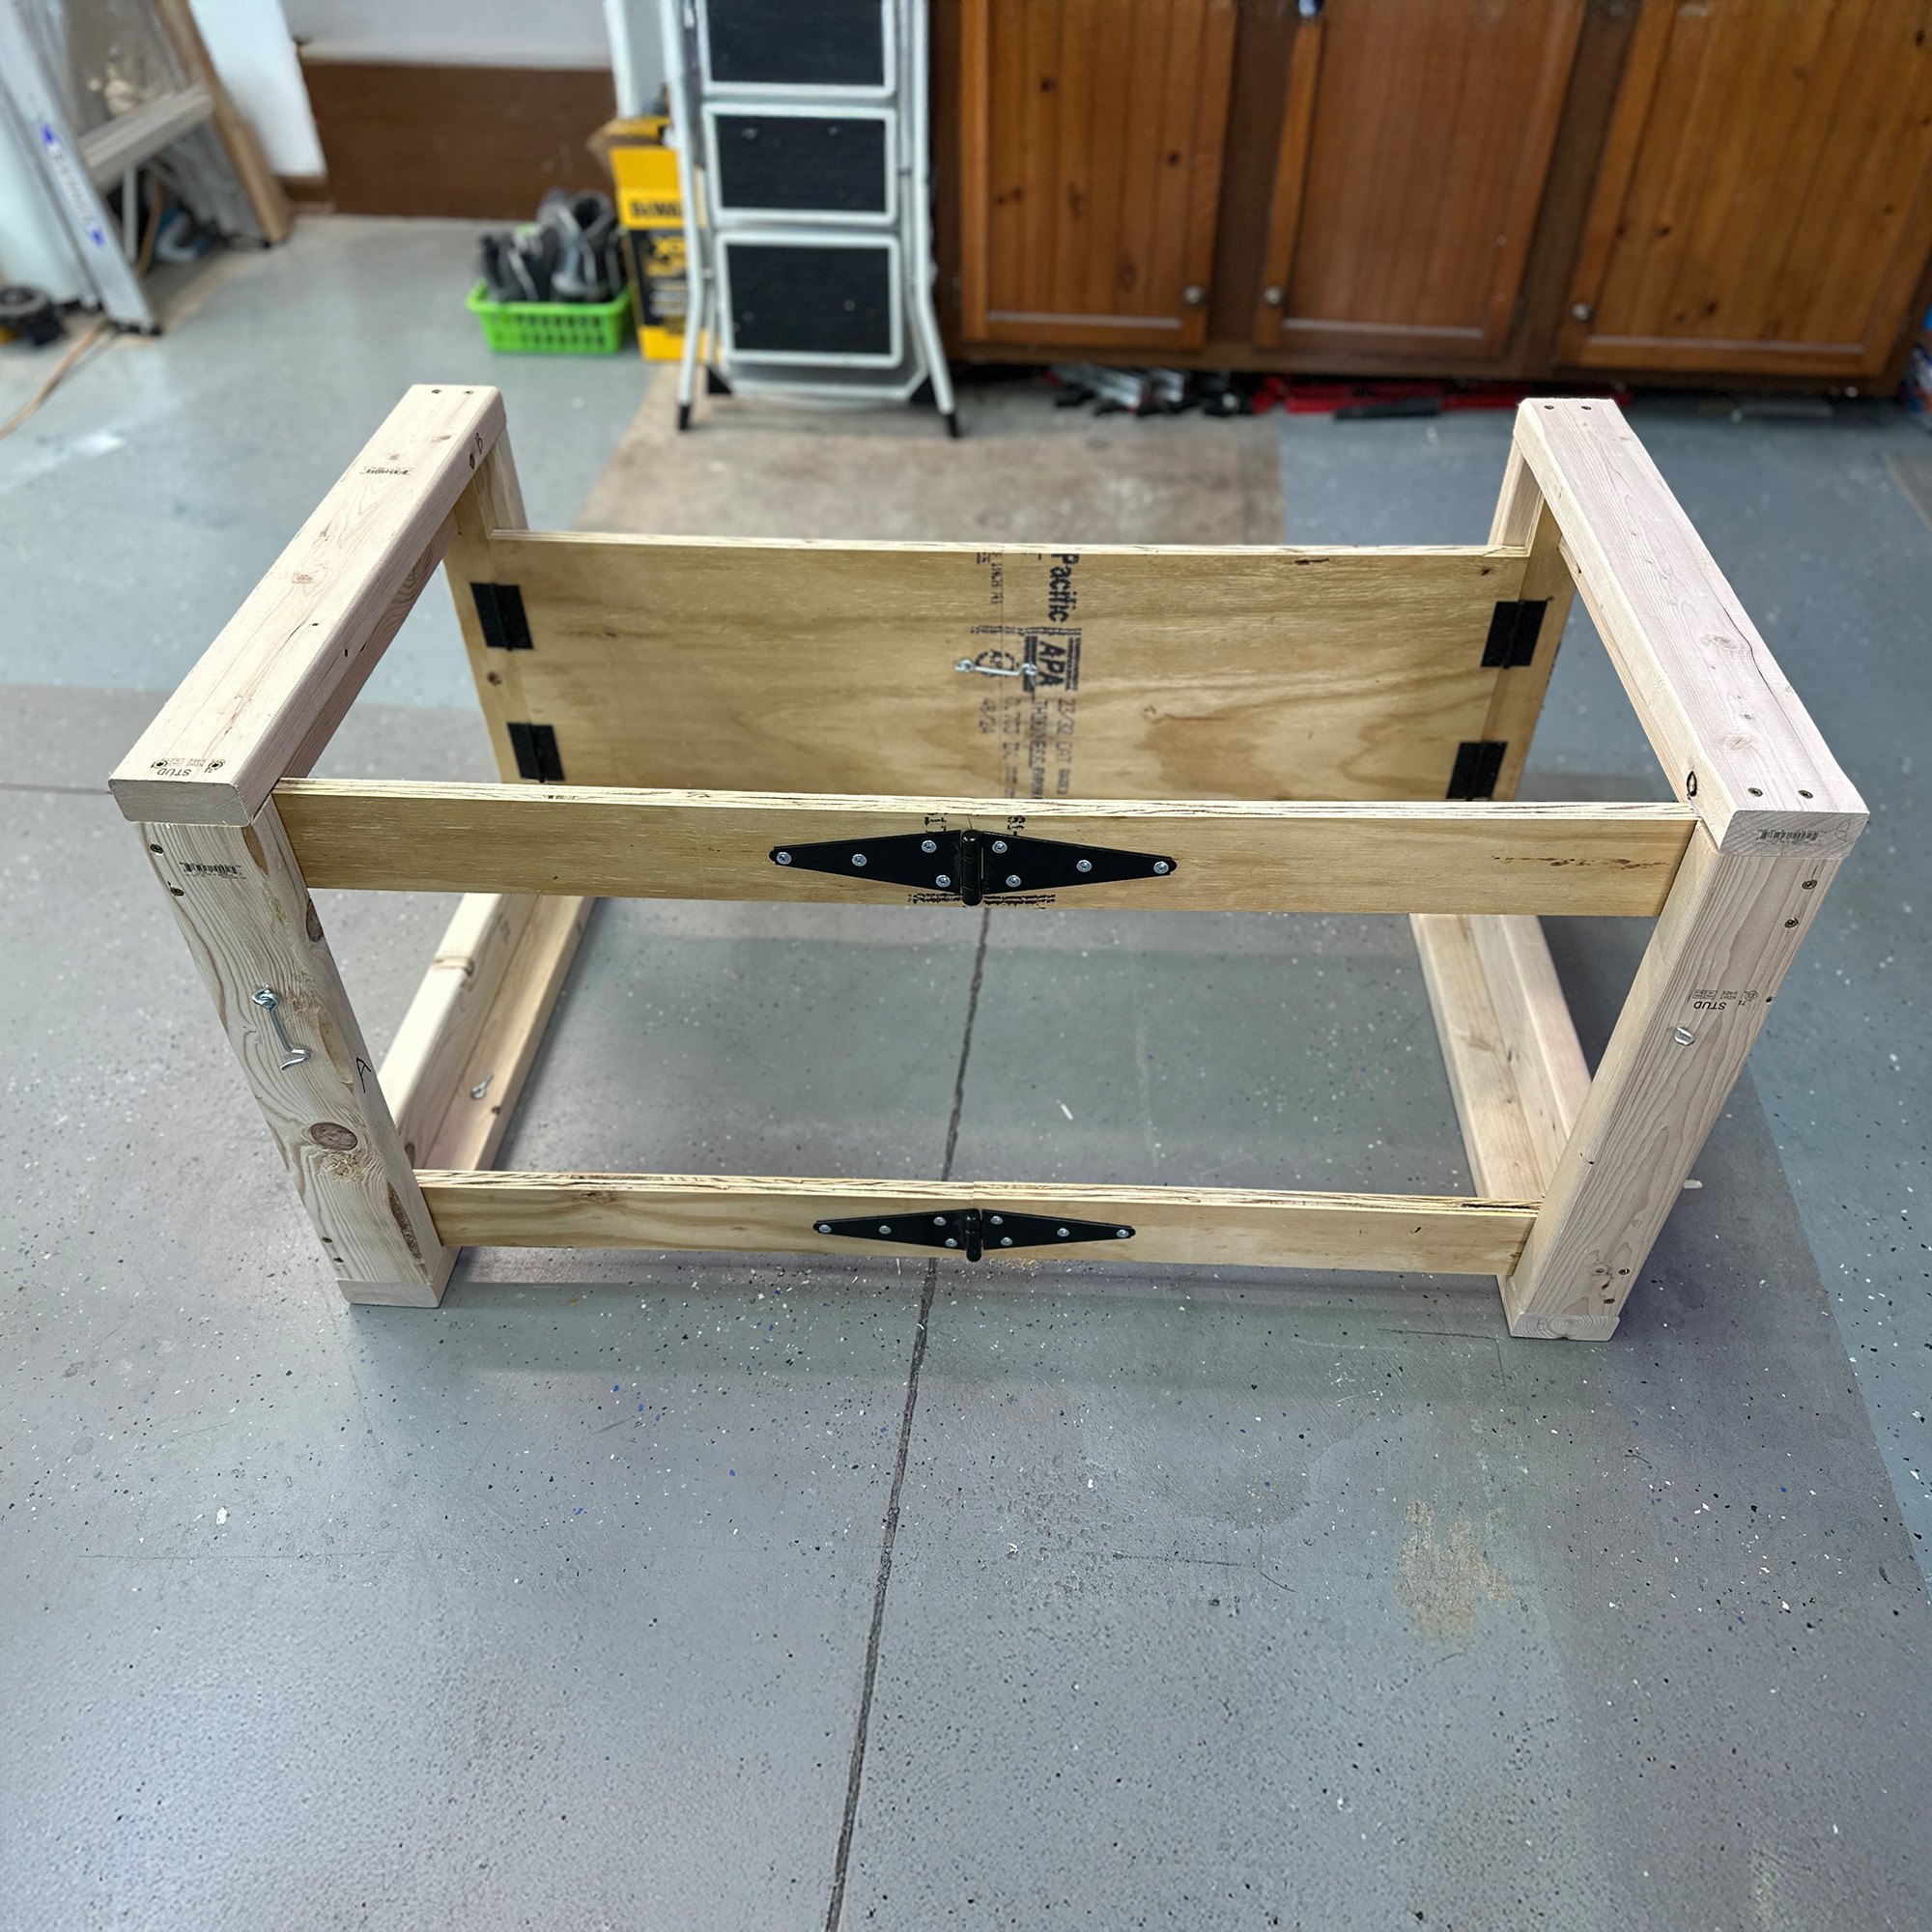
A combination square is handy for aligning hinges equally from top and bottom. The strap hinges always go on the opposite side as the butt hinges to ensure the proper folding mechanism when collapsing your workbench. Here is where those silver truss fasteners come in handy when attaching the 6″ strap hinges. The butt hinges come with the screws you need.

You already have all the parts ready to assemble the frame of the workbench but let’s get the table top ready for T-Trax before we get ahead of ourselves! First you’ll need to figure out your T-Trax spacing. I used ChatGPT to help me with this math and here is where your lines will be to place the T-Trax on center and be spaced evenly for a table top that is 44.75” wide:

I used my Square300 for this step to keep my lines straight and to layout my T-Trax and check the alignment prior to making the grooves to inset them.
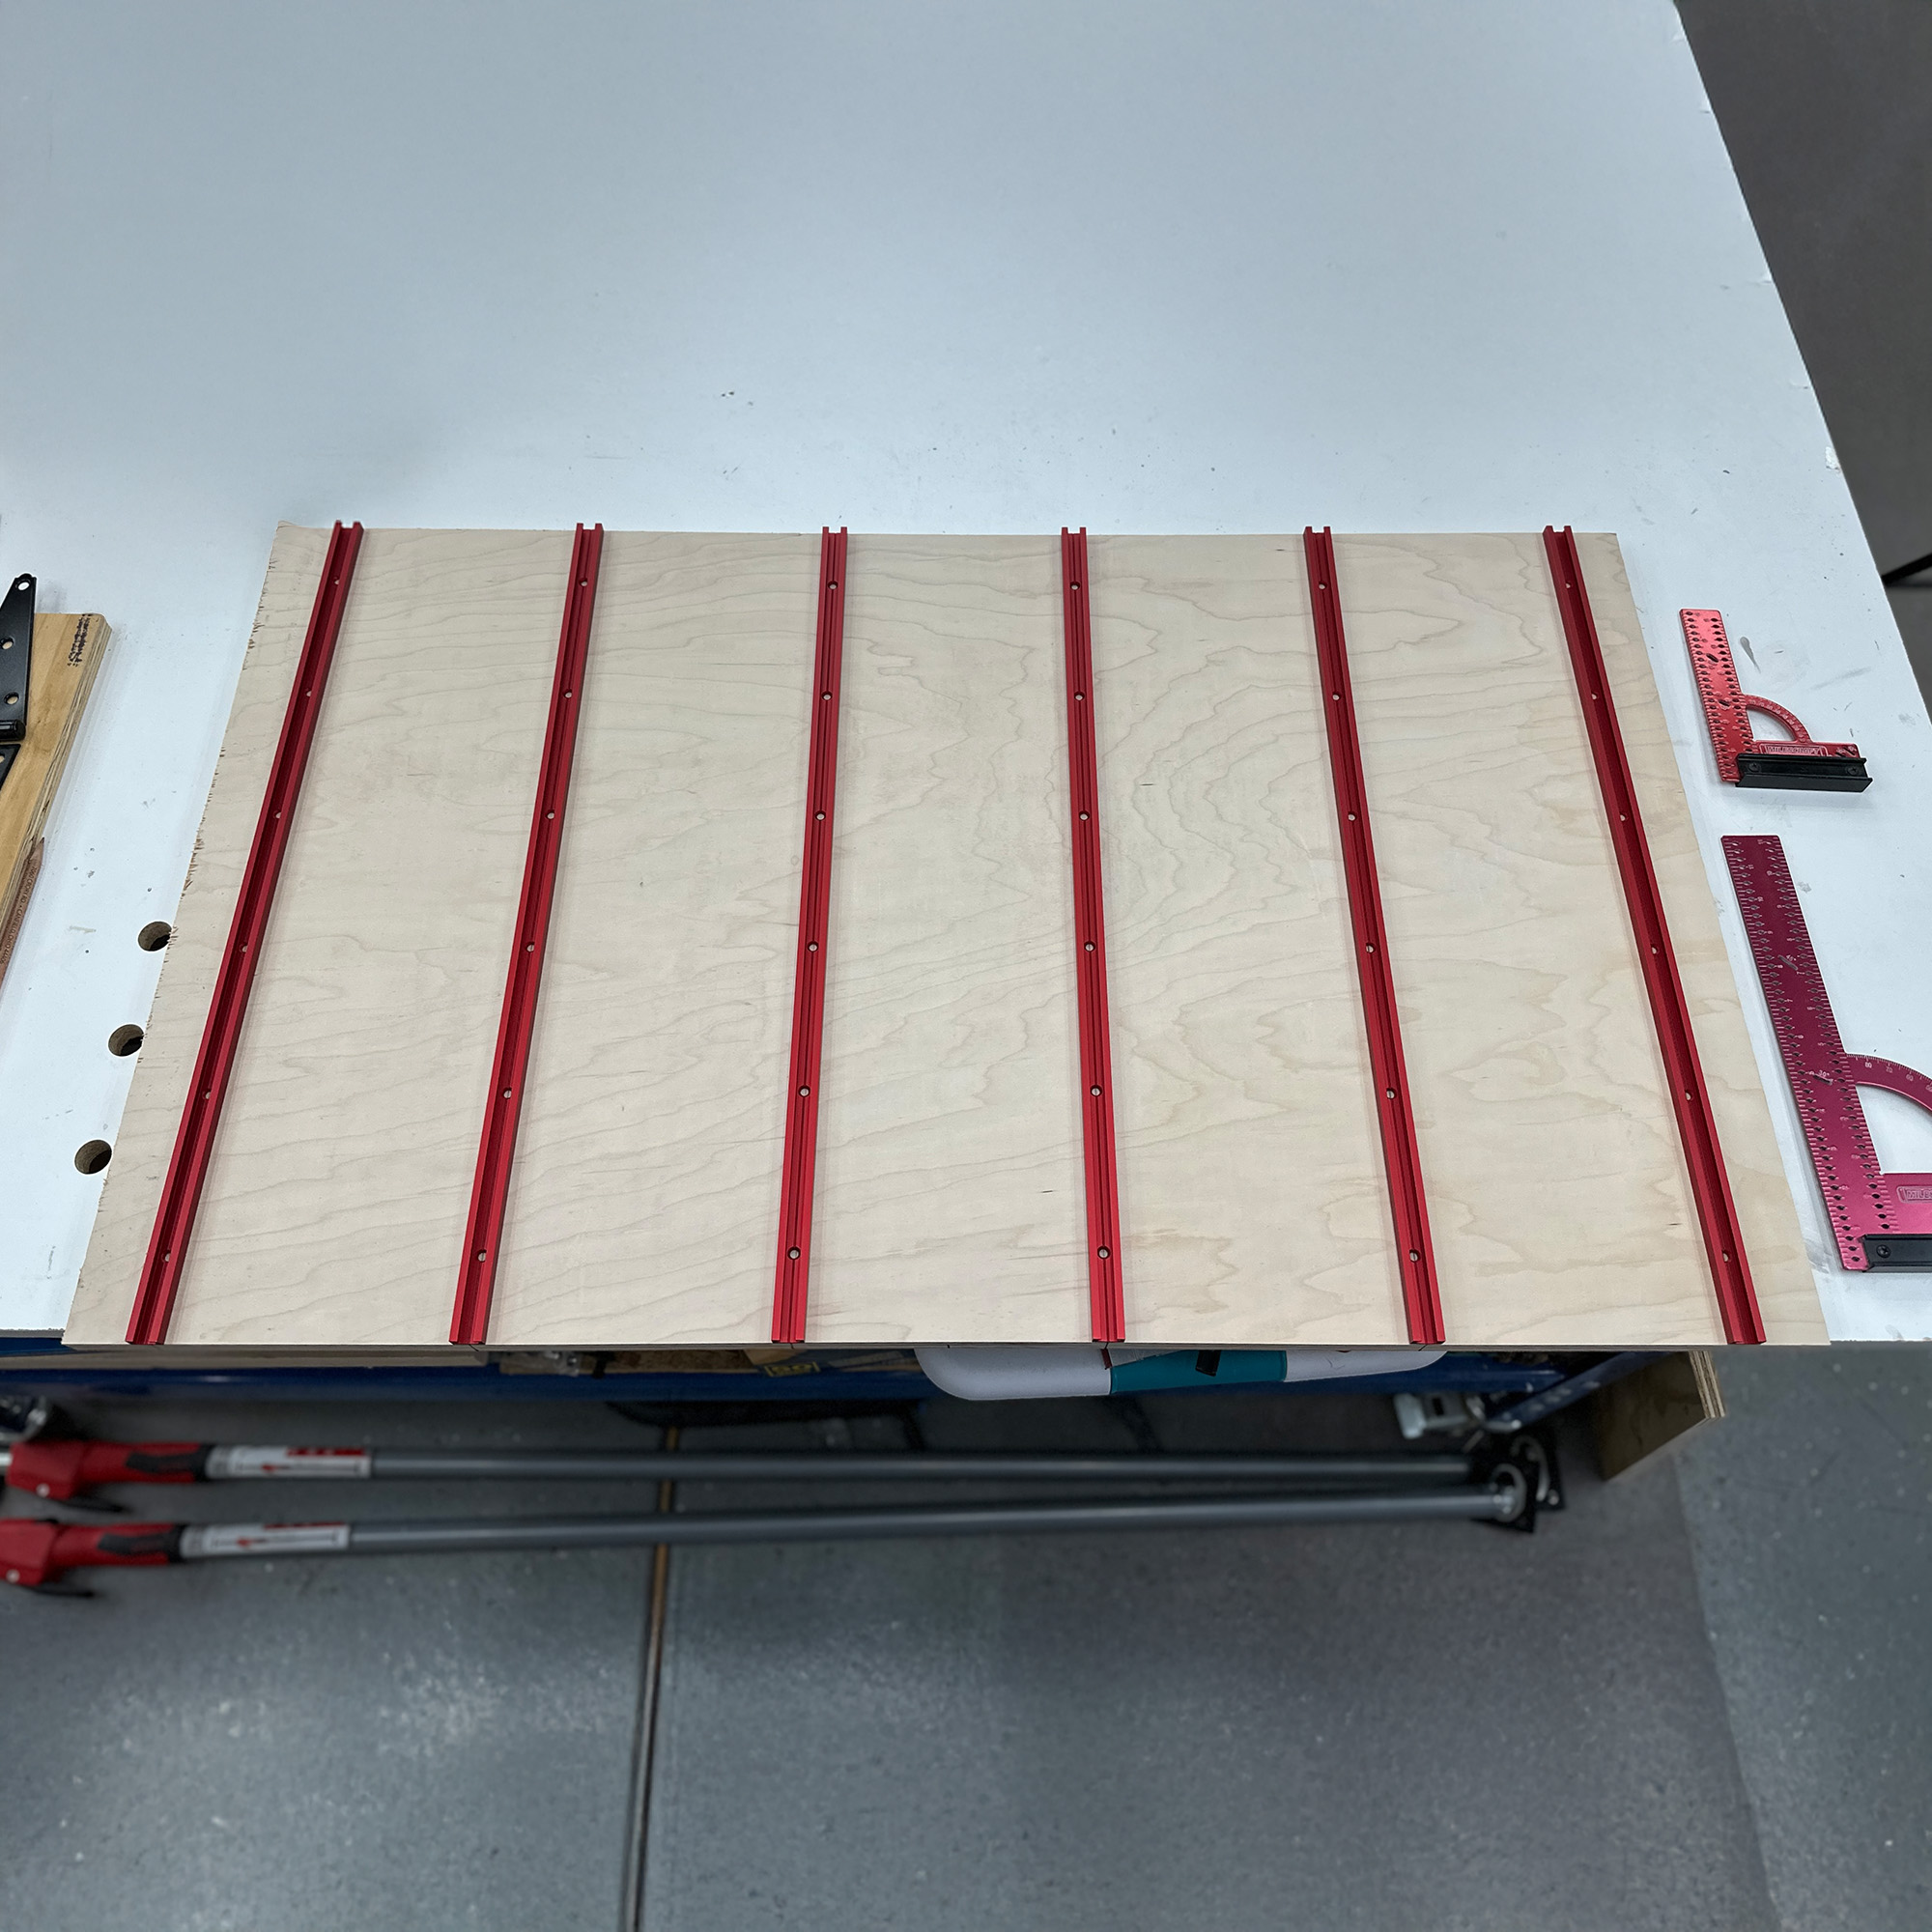
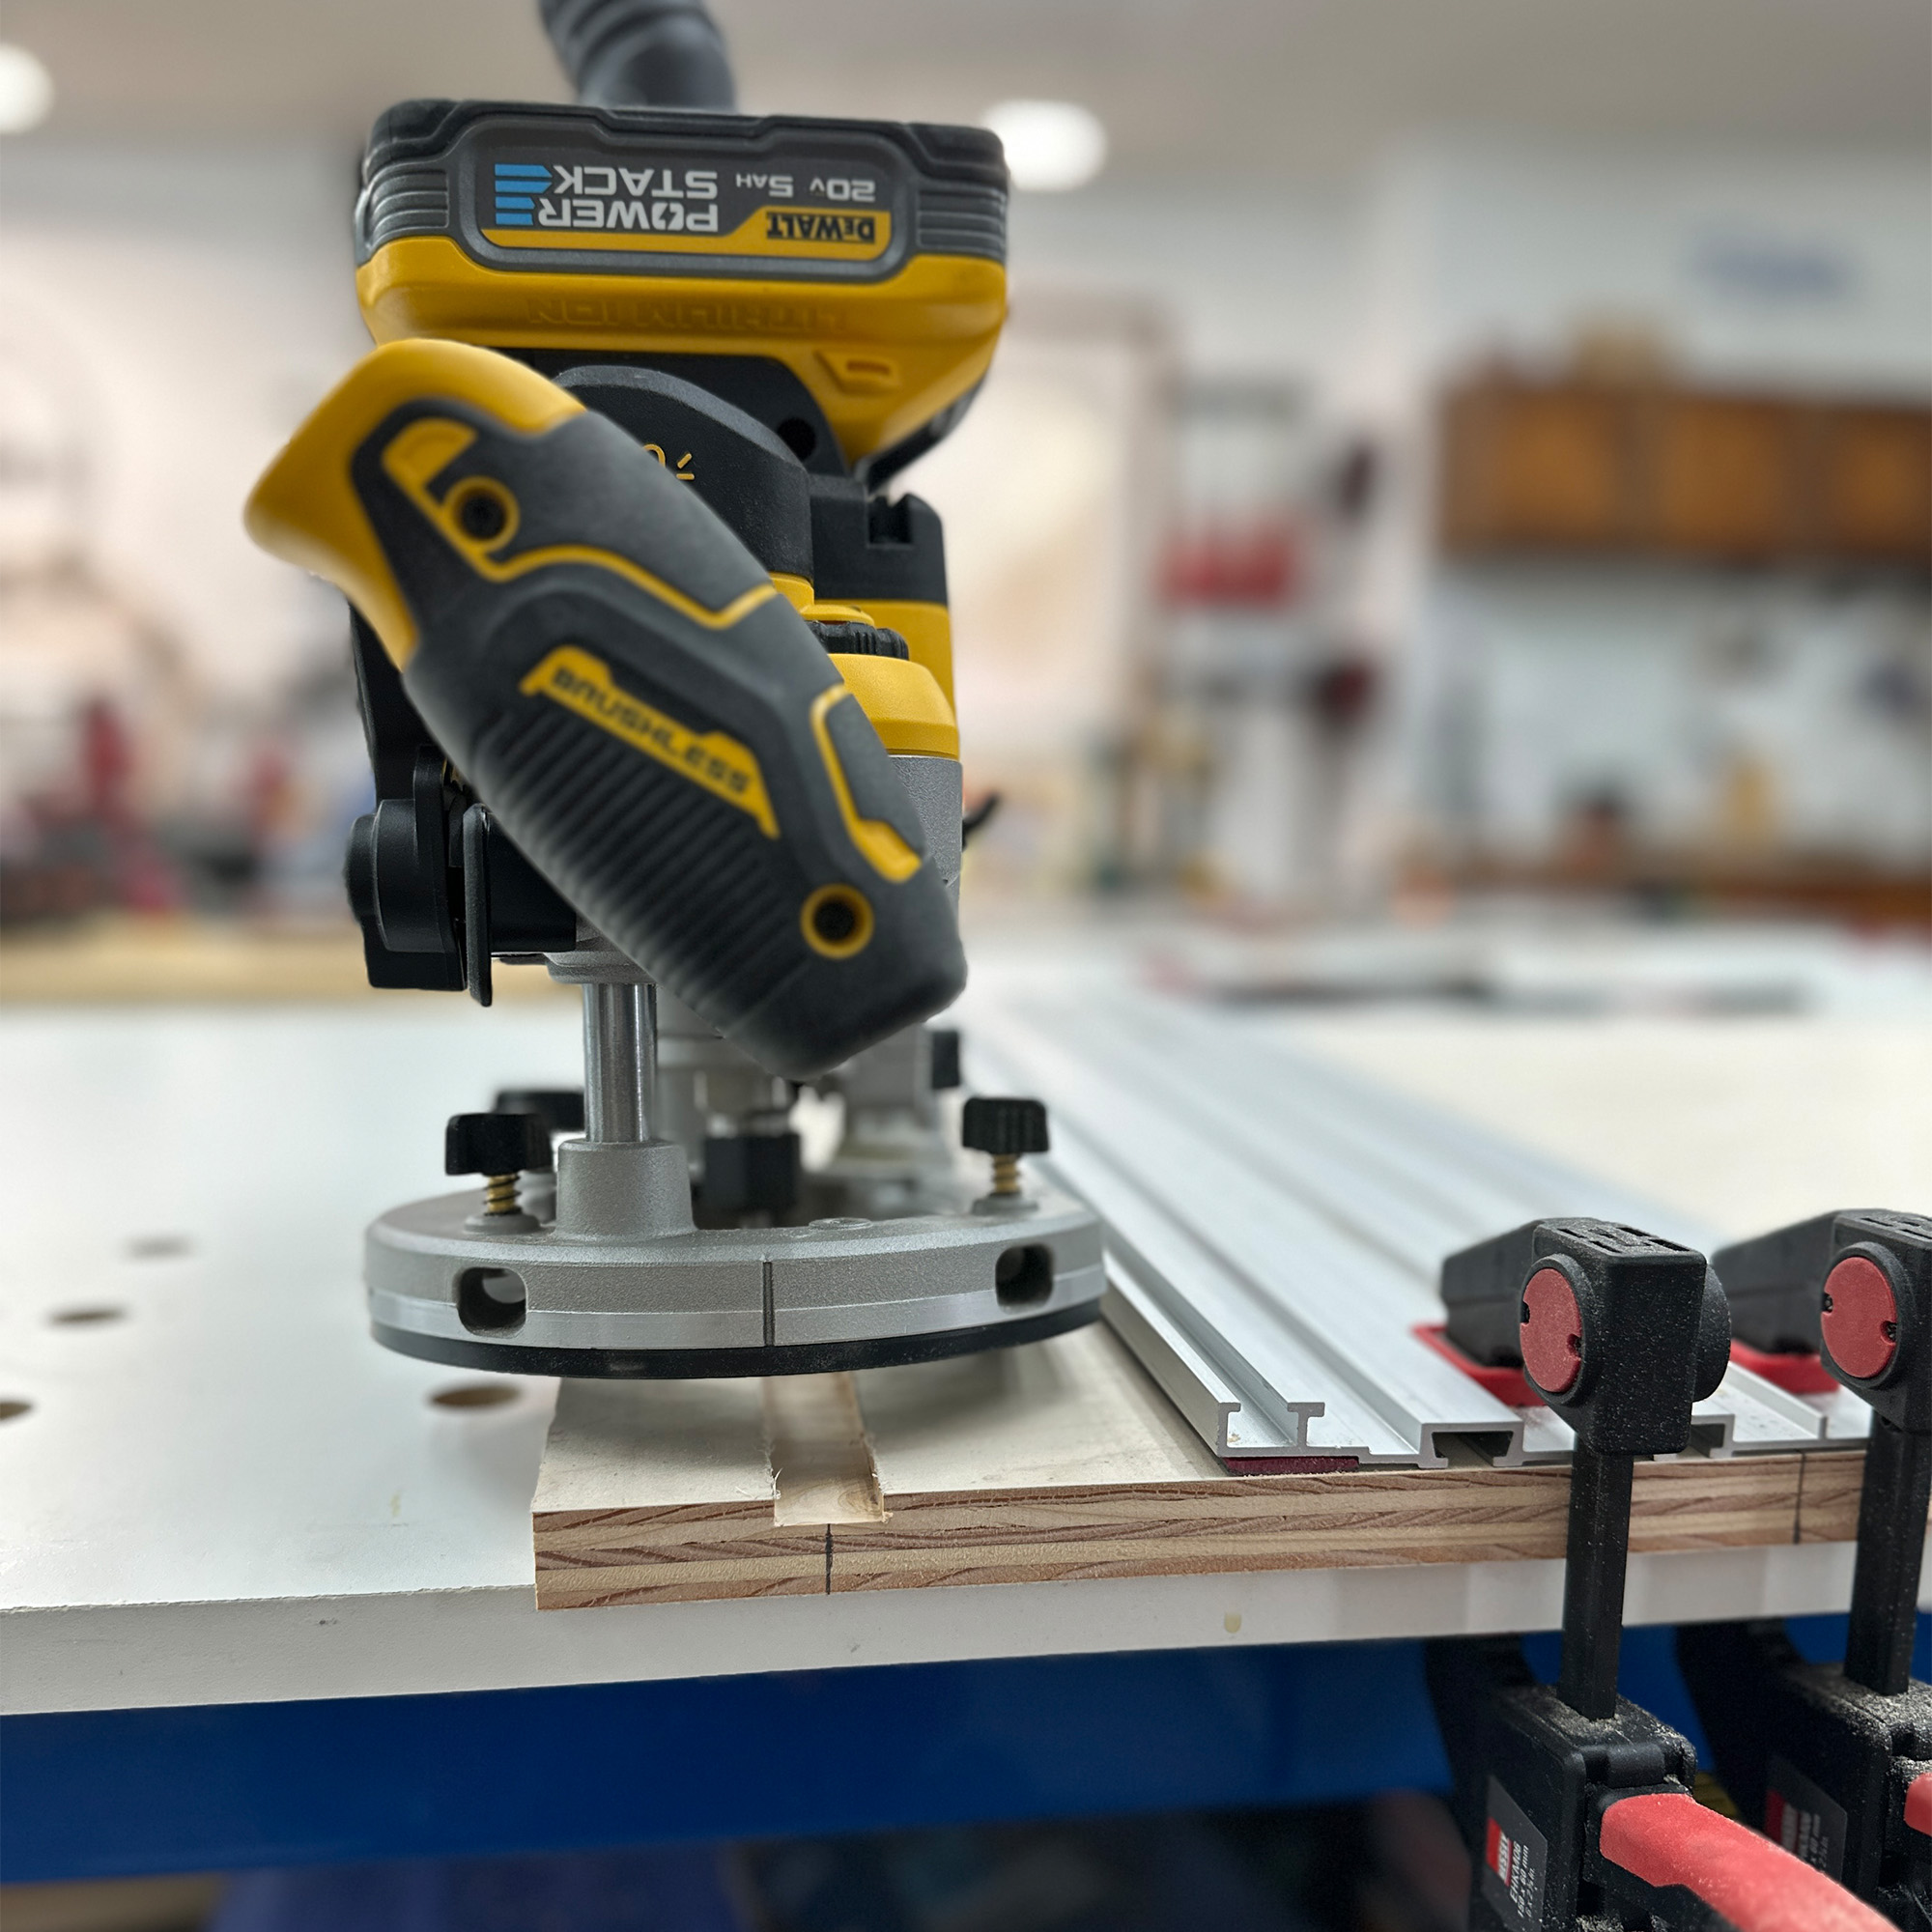
I chose to use the 24” Trax so that they would fit the size of my table top perfectly. For this step, I opted to use my plunge router and a 3/4” straight bit to cut the grooves for the T-Trax to fit securely into. My router has a straight edge on one side of the base plate so it was able to ride up against my TrackSawGuide rail for a straight line cut.

I laid my parts out before fastening to ensure I would have enough clearance between the plywood parts. Again, the original plans made this bench too short if you ask me and barely no clearance between the folding parts so I modified the plans for you! You’ll have way more space between your folding parts and it will make it a lot easier to open and close.
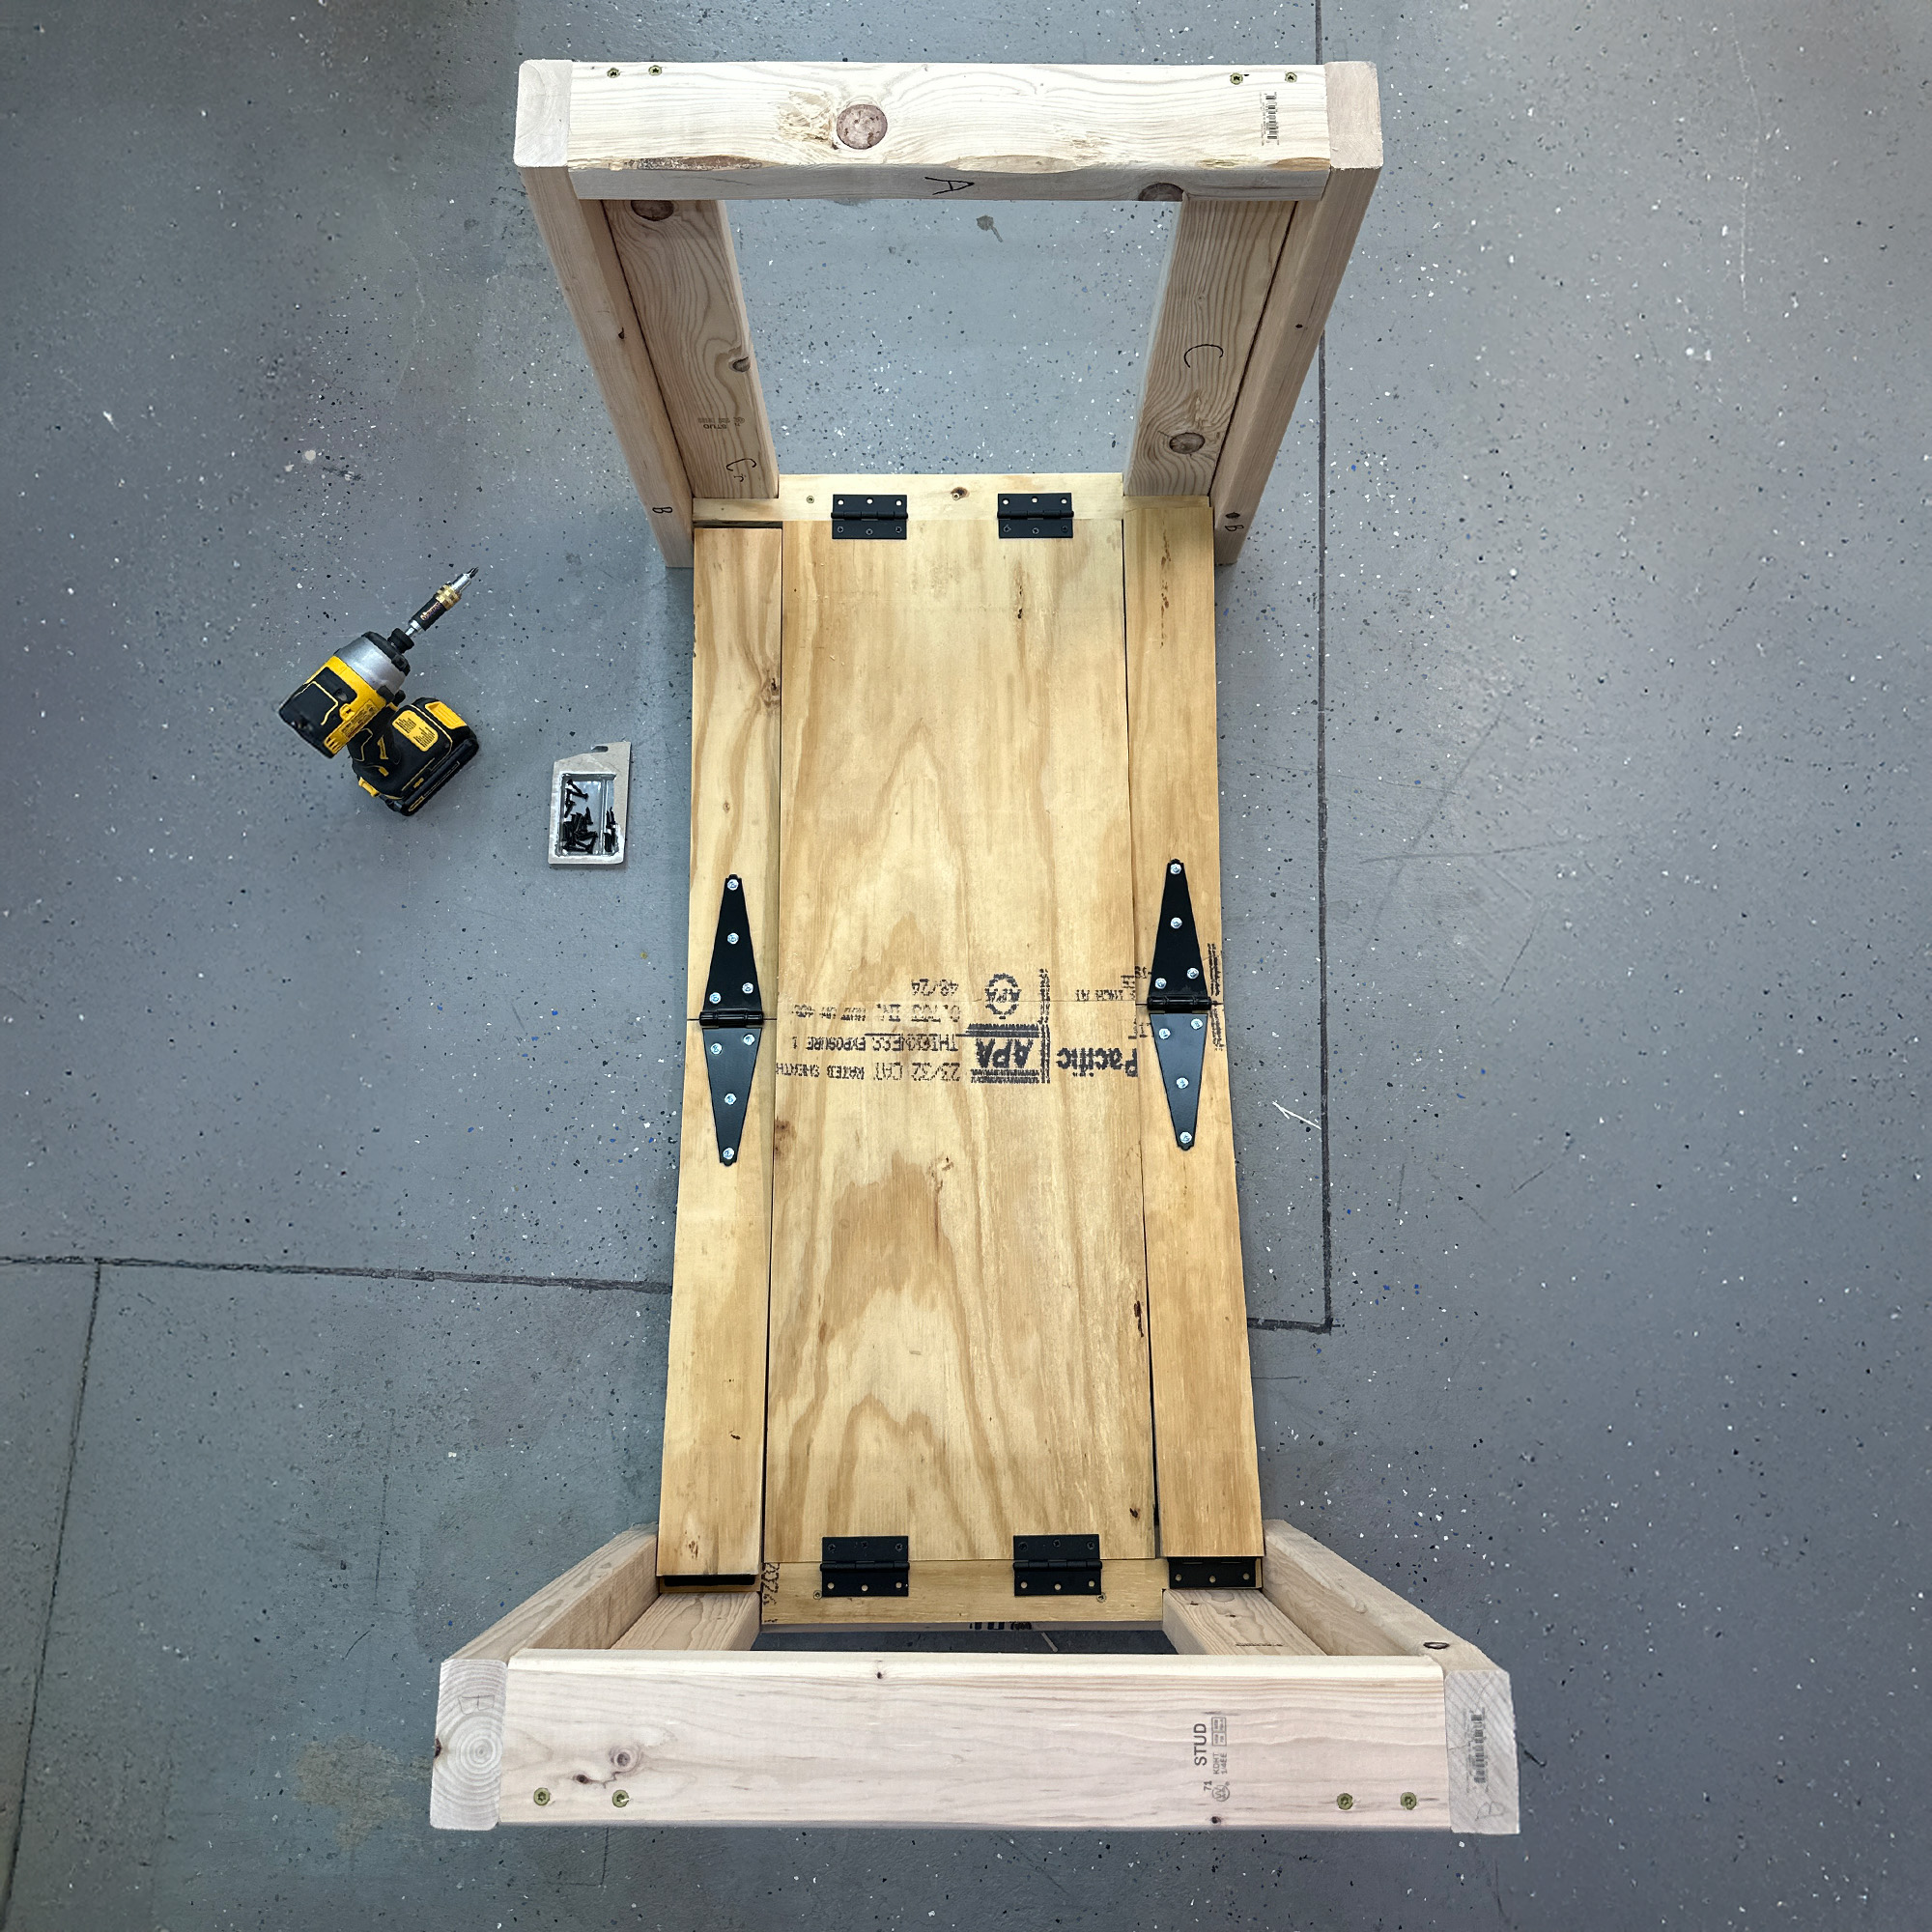
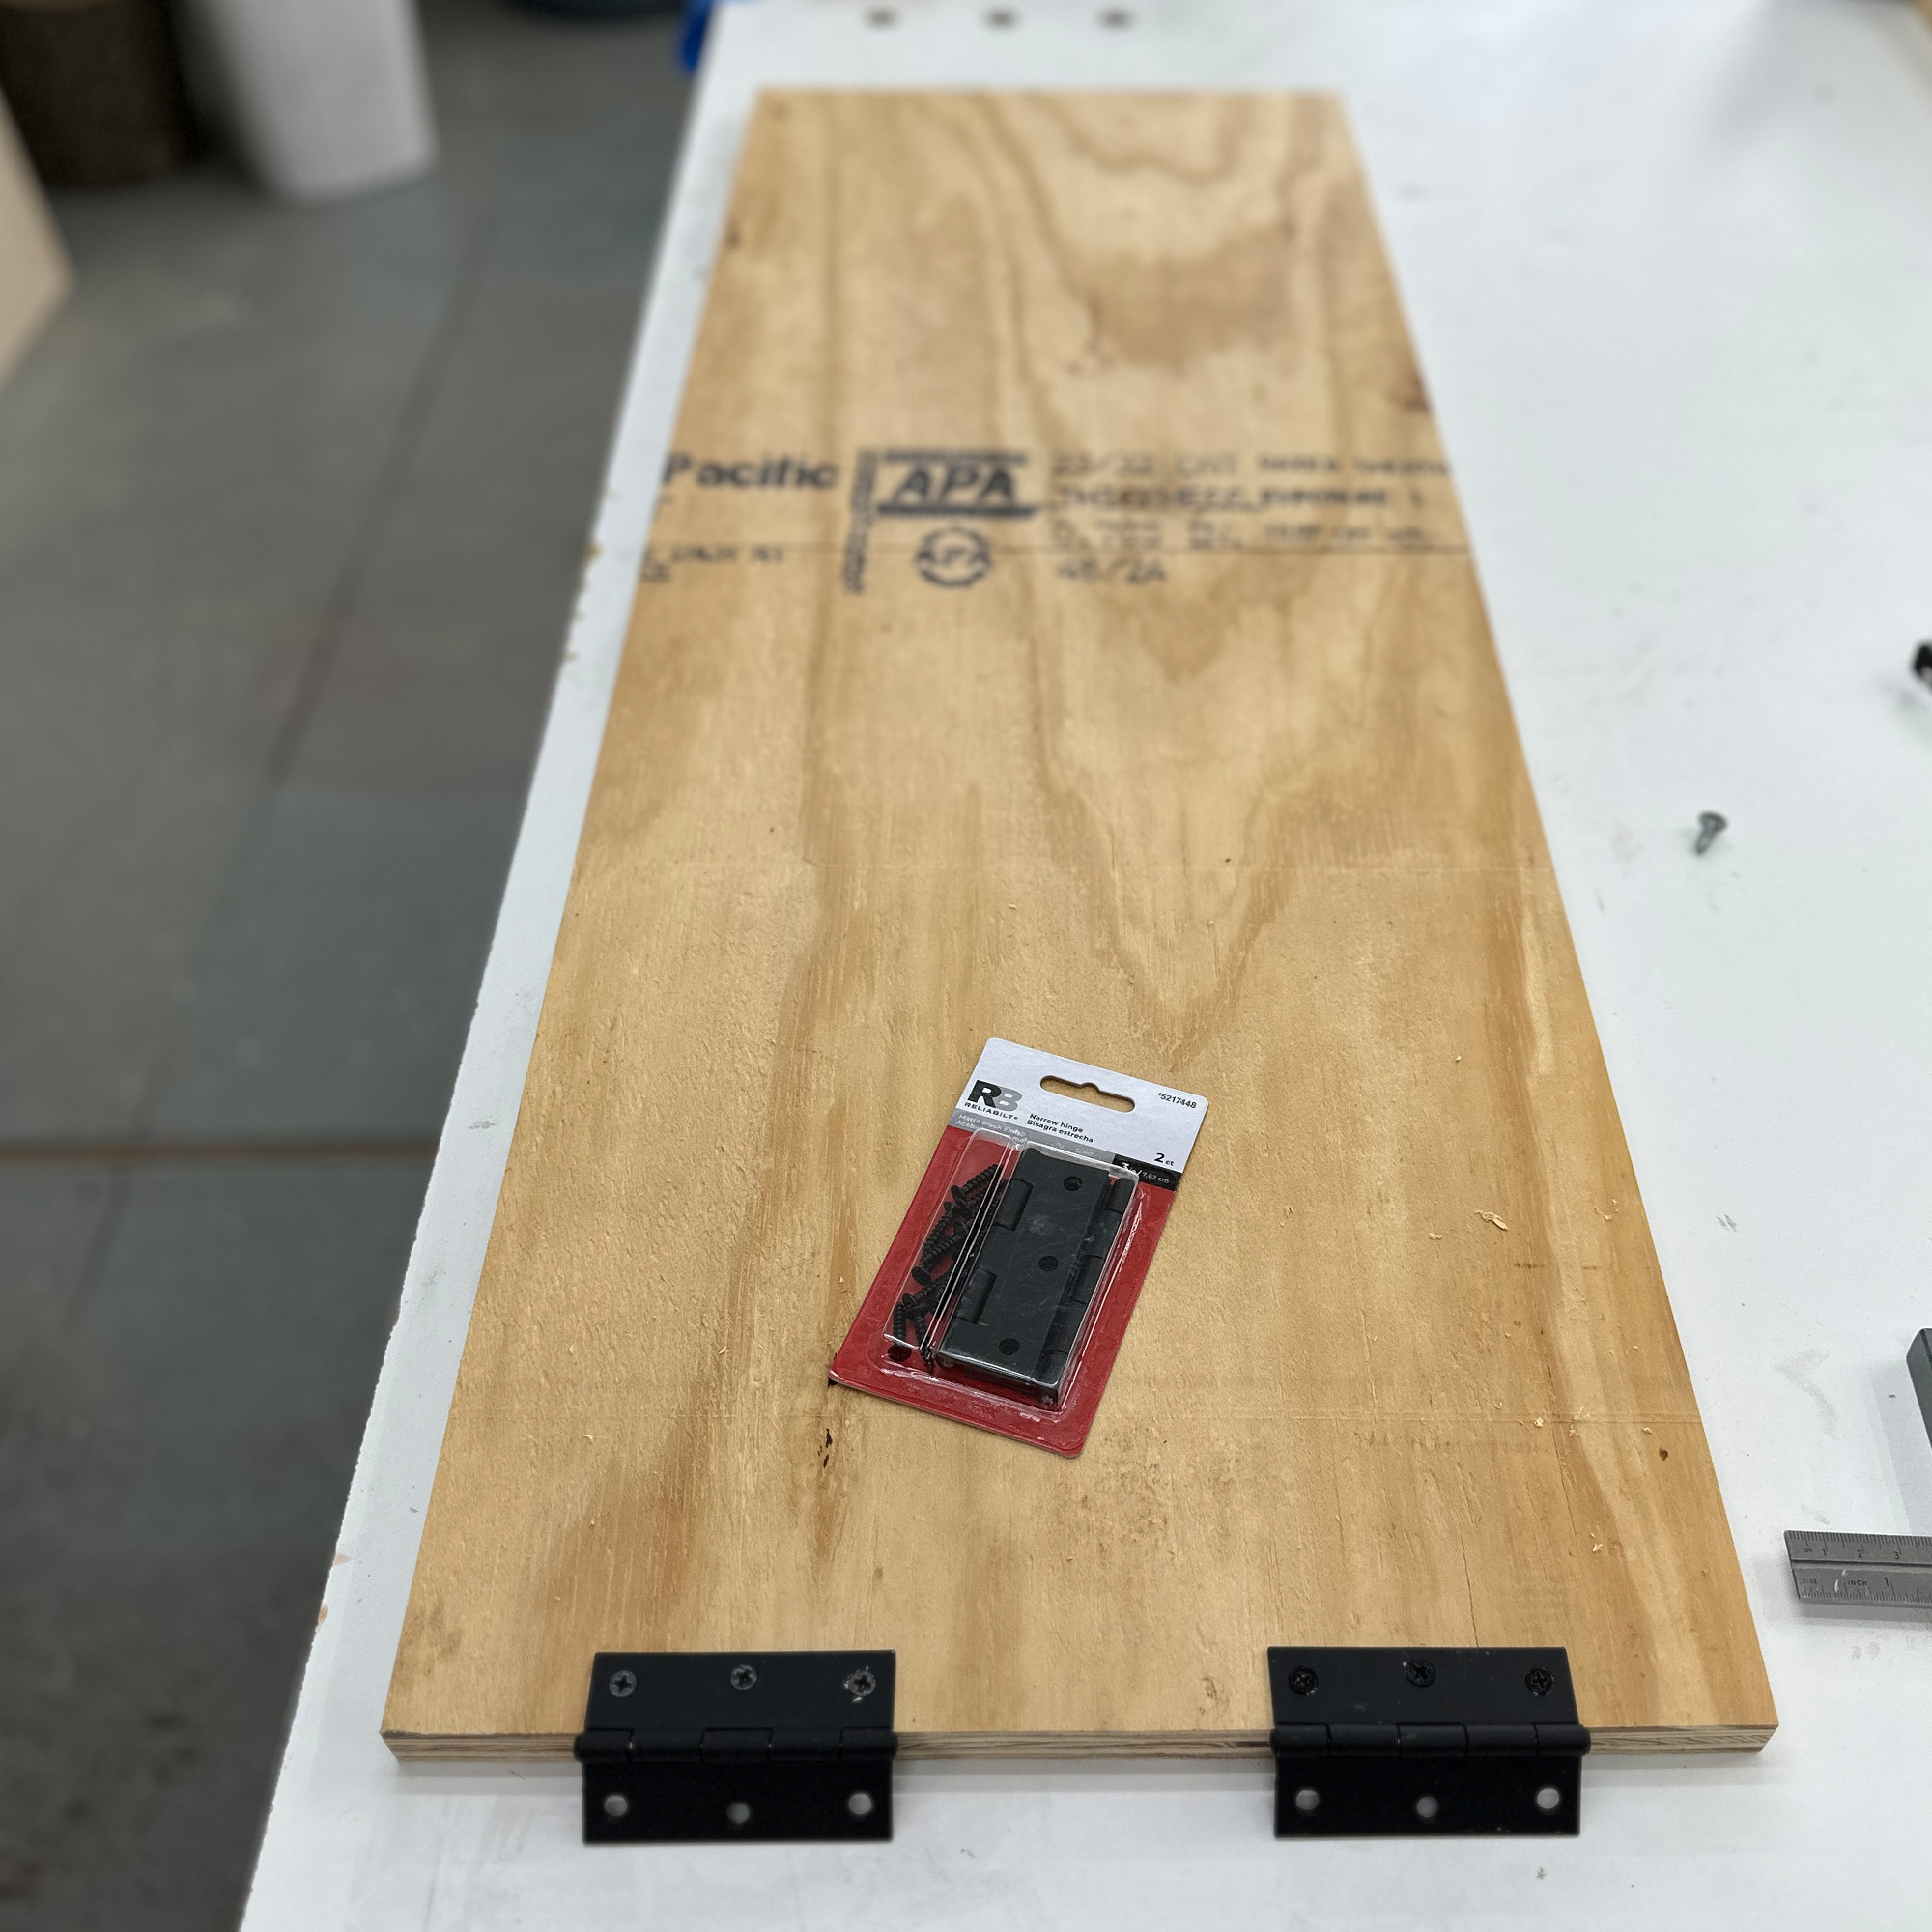
After fastening the butt hinges to the Part D hinge mounting strips, you’ll be able to see why we notched those parts and how that gap leaves space for Parts E and F to nest into the workbench when it is collapsed / closed.
How cool is this?! When the workbench is collapsed, it’s only 7” wide! Now you get it, huh? The 7” Workbench!

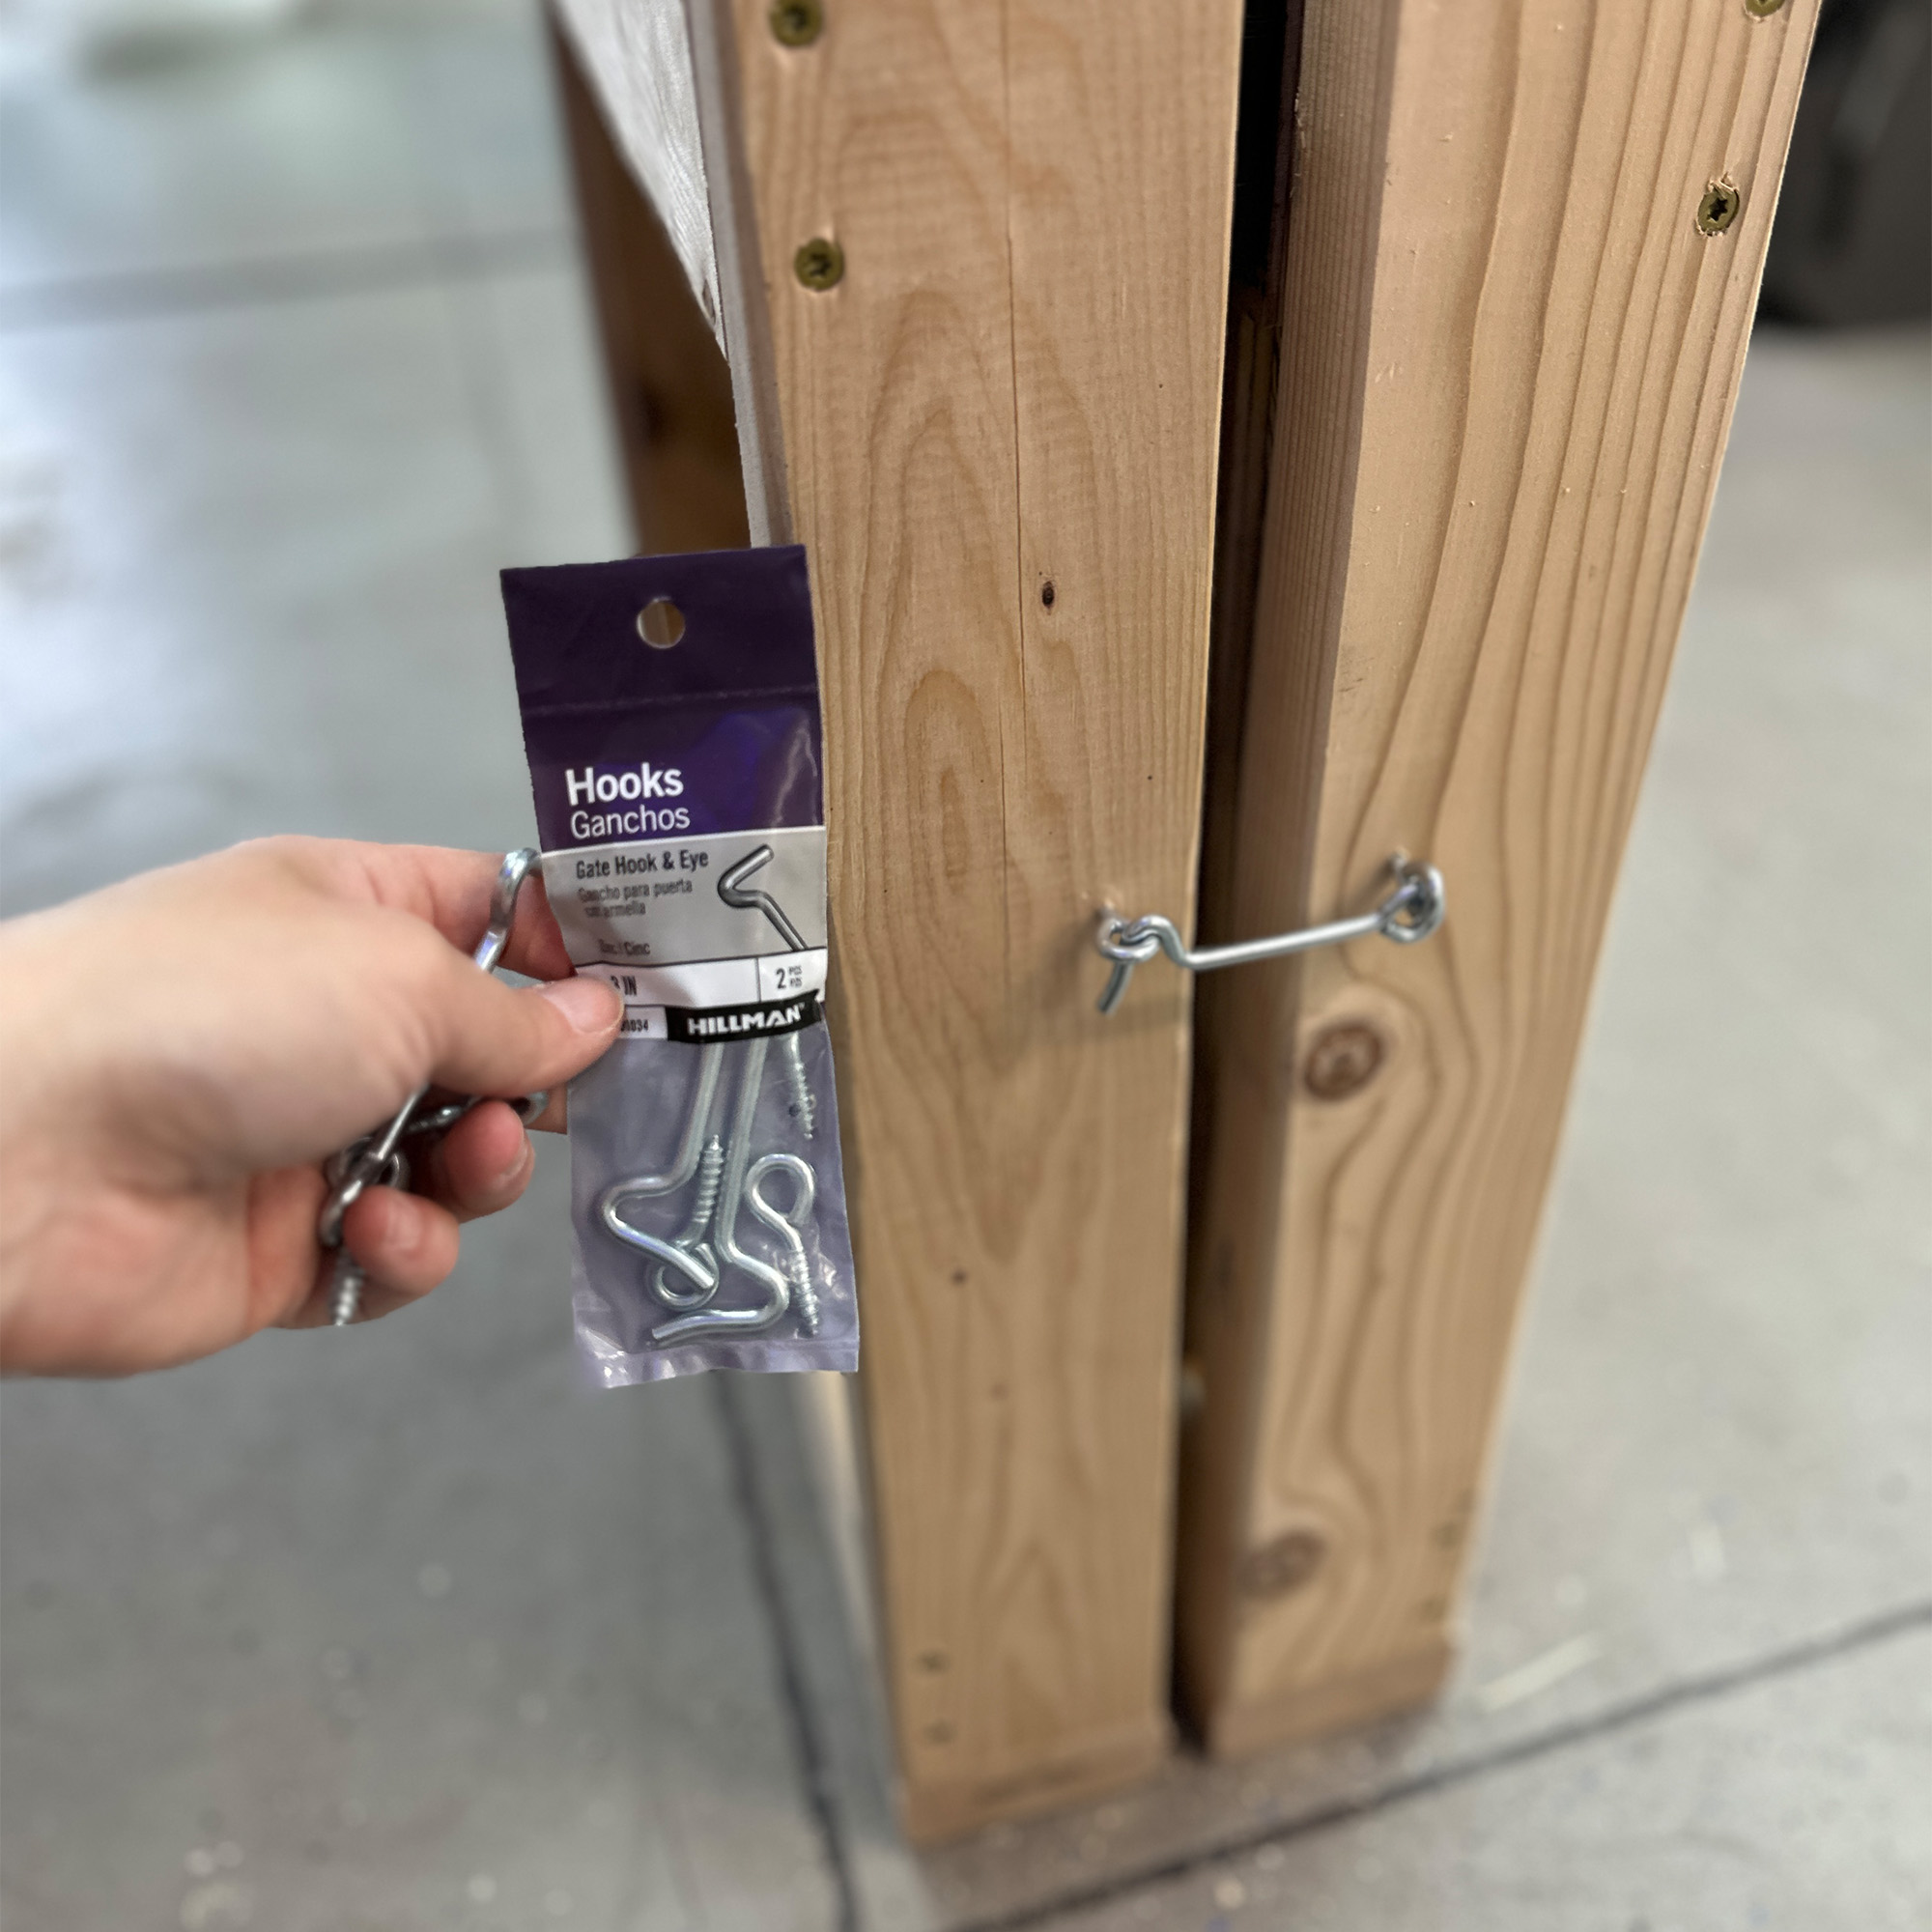
These are essential for both keeping the workbench open when in use and keeping it closed when stashed away.

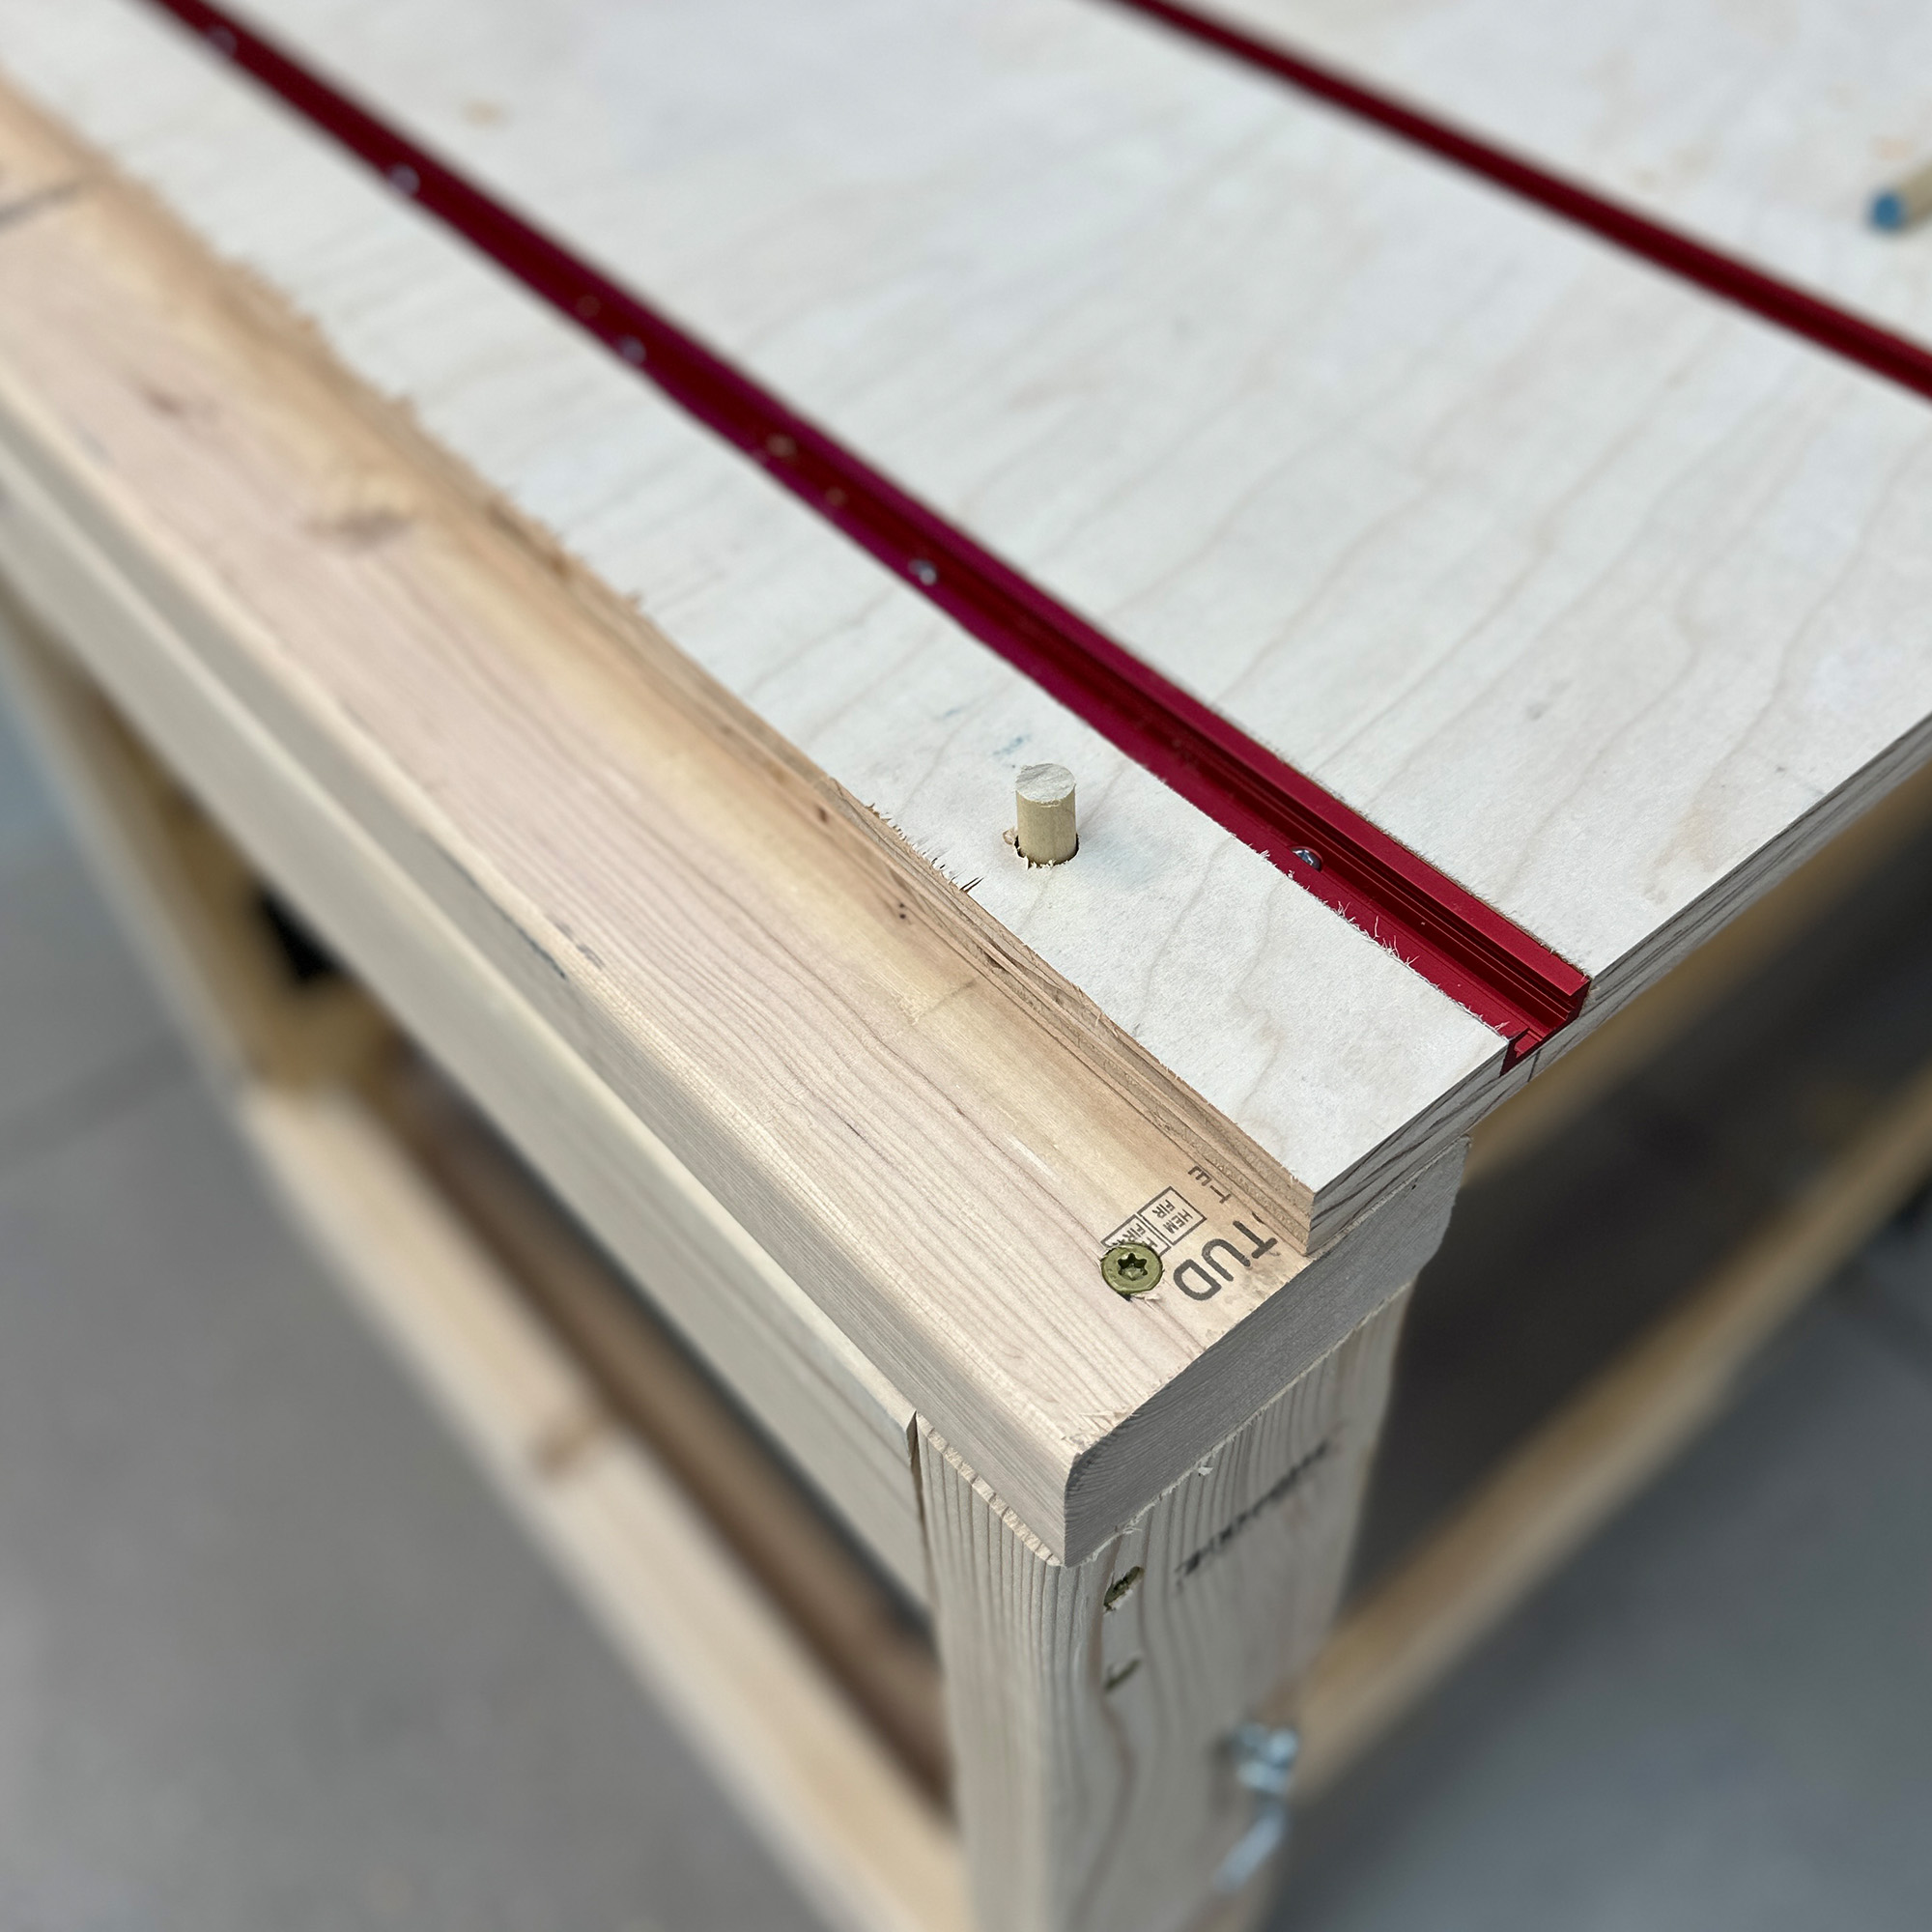
Since the table top doesn’t stay on all the time to make this easy to put away when not in use, I thought locator dowels made good sense. I placed the table top onto the workbench and held it in place while using a 3/8” drill bit to drill straight down through the top (that’s what the 2” margin is for) and into Part B frame rail. I repeated this on all 4 corners and inserted 3/8” dowel road, flush trimming it with my pull saw. So satisfying!
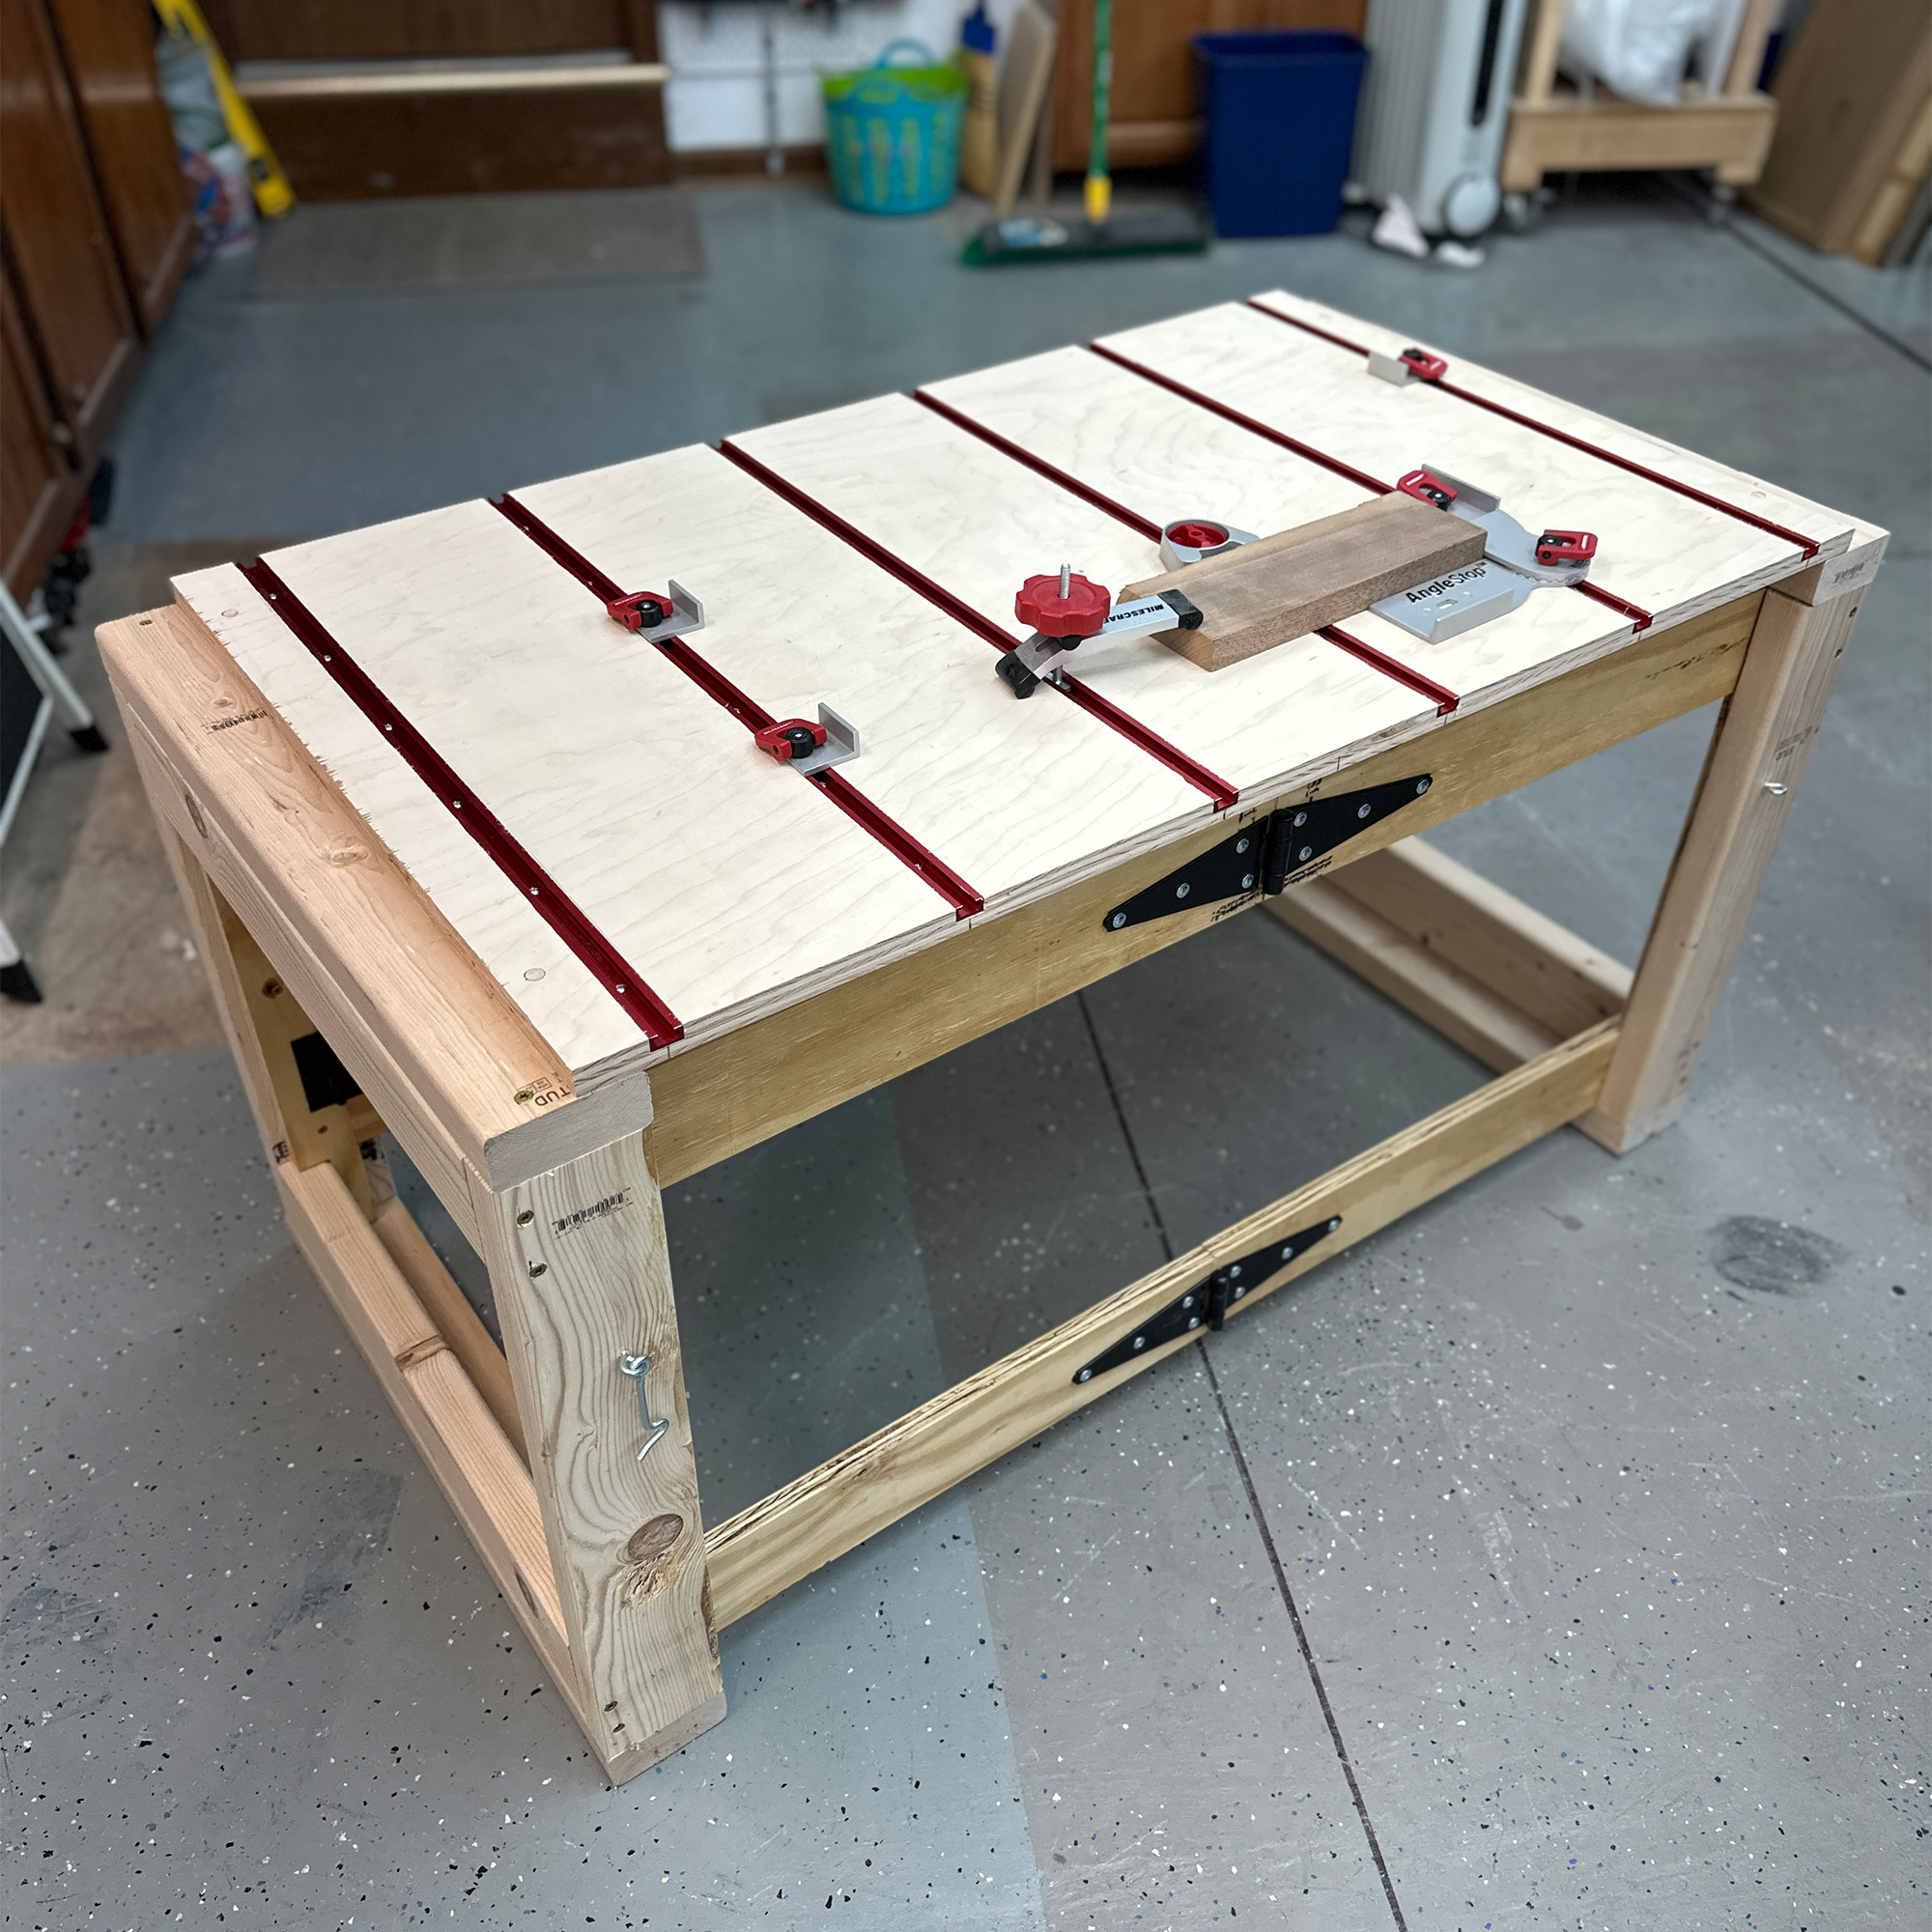
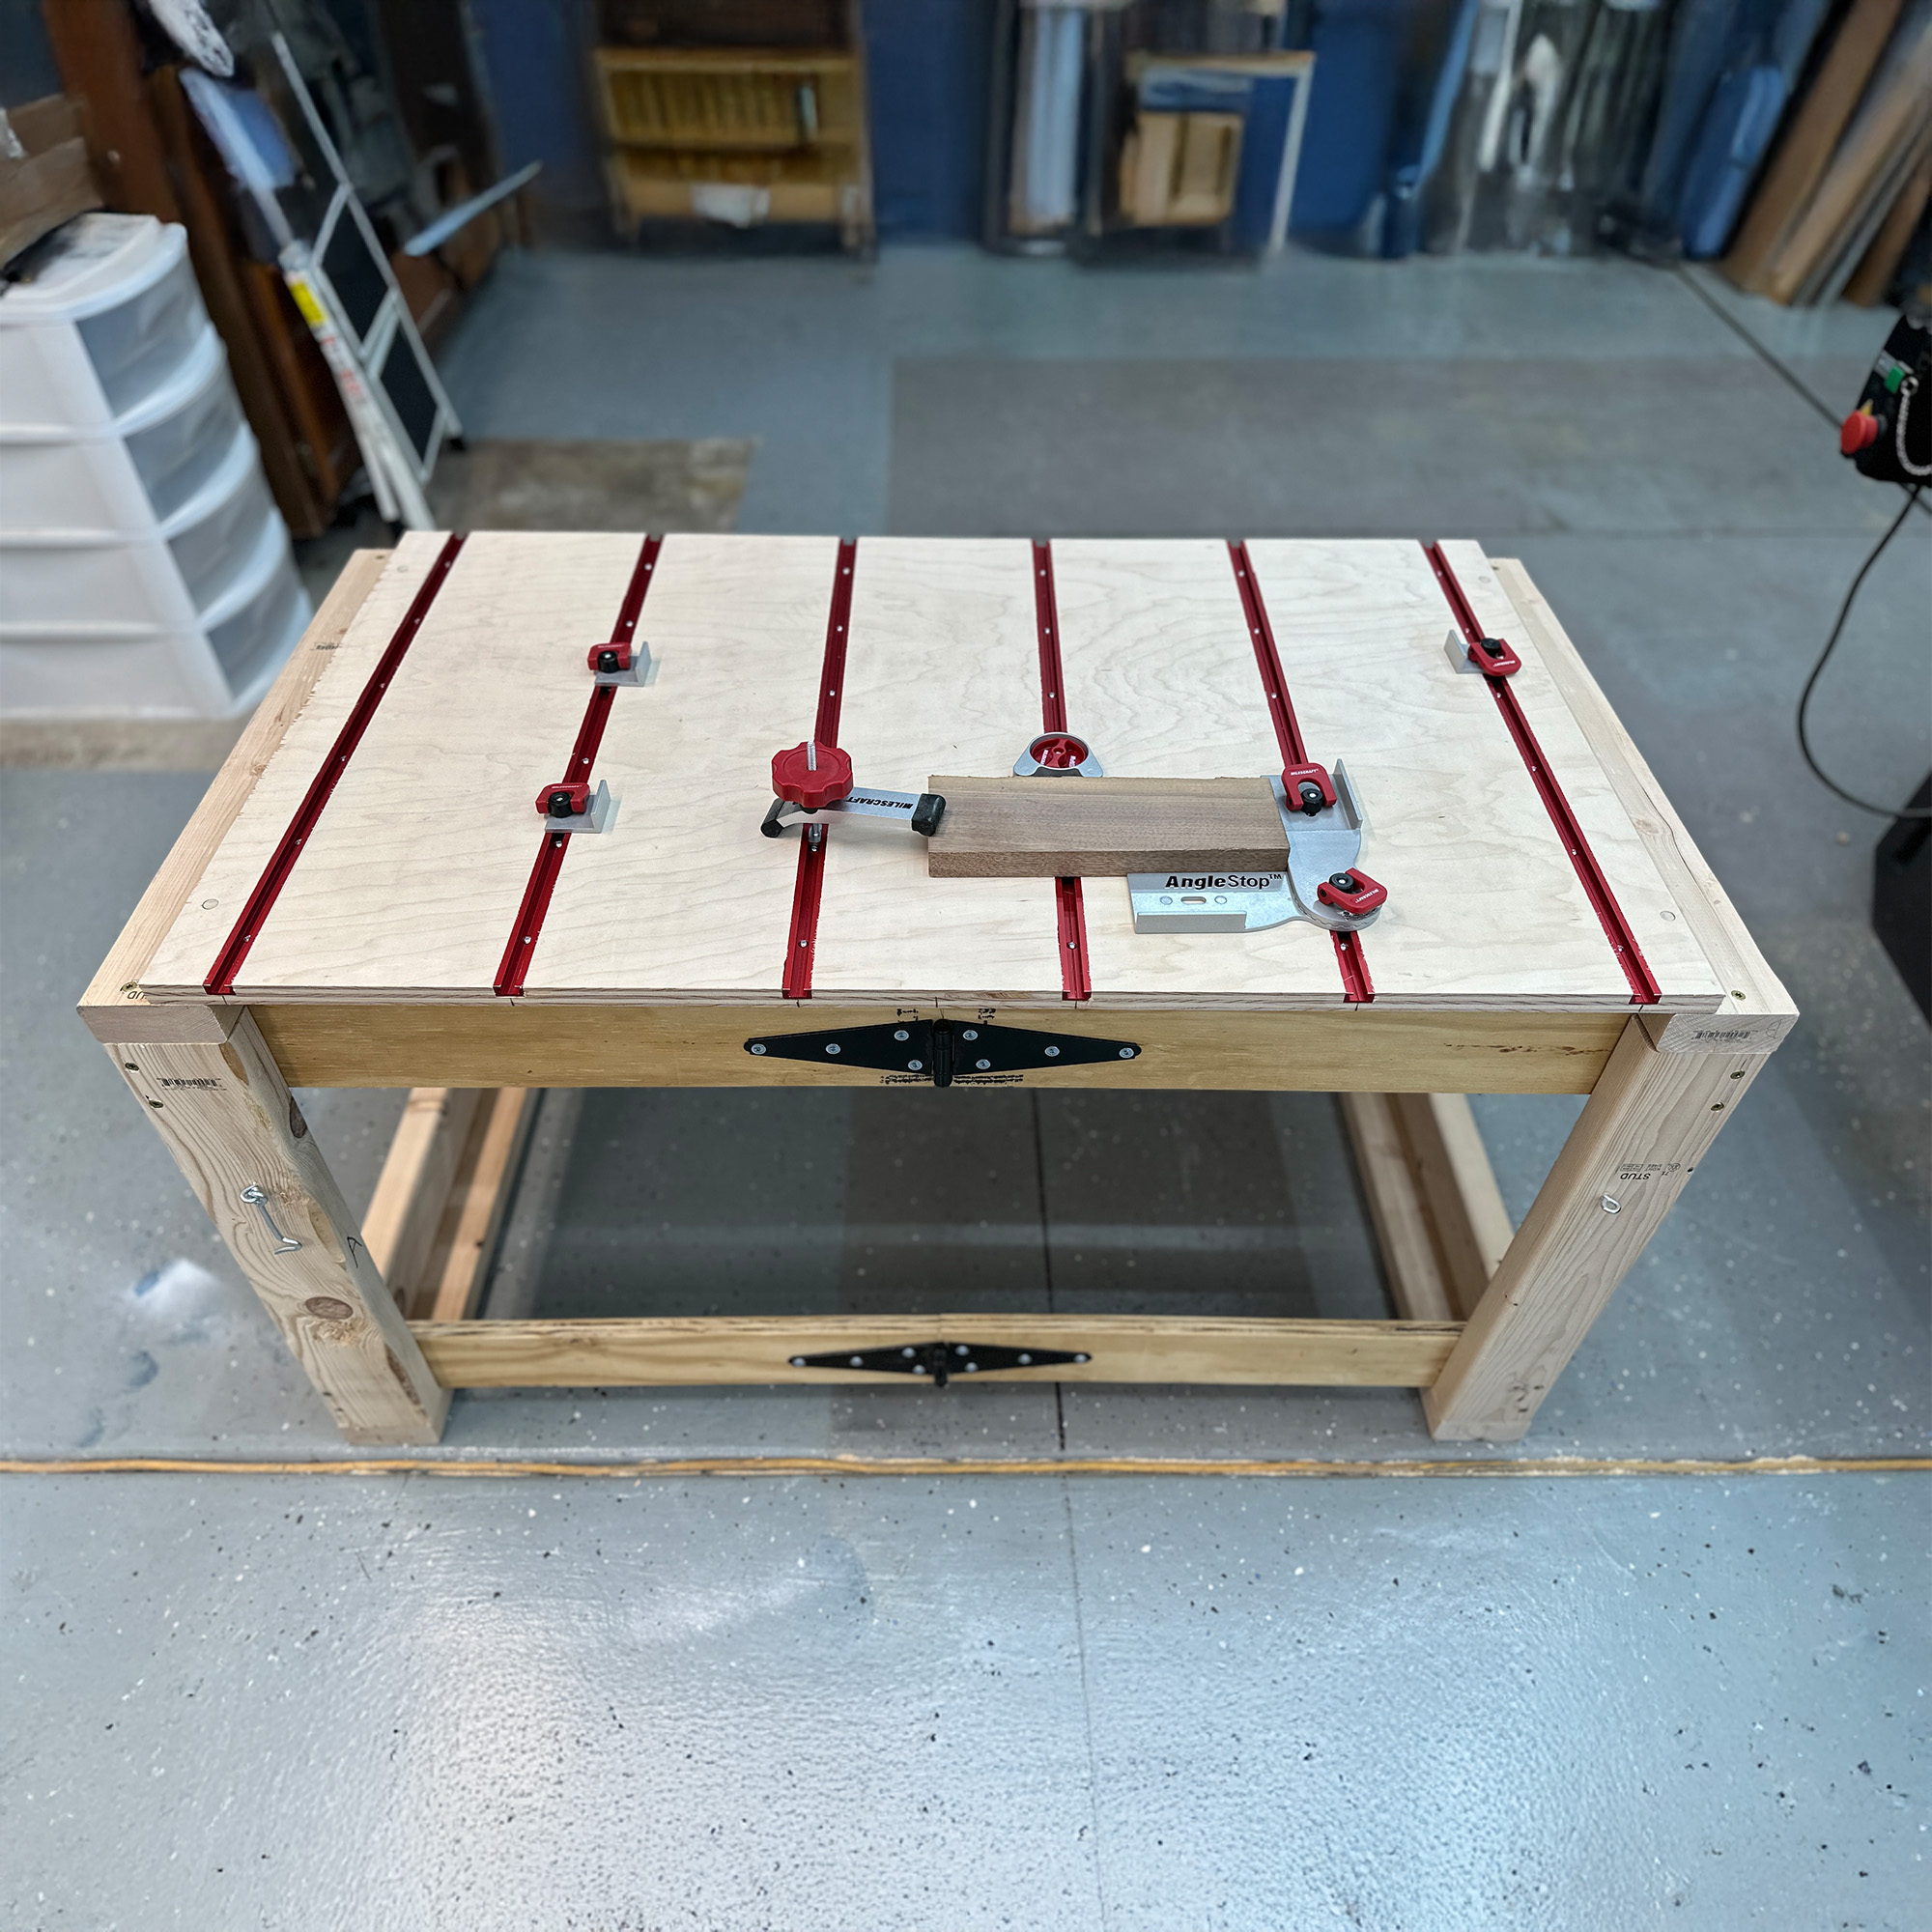
Now the fun part! Time to accessorize this table top with all the best new clamping solutions for our multifunction workbench! I installed several CamStops, the AngleStop, the MultiStop, and a couple HoldDown200’s. Some other great accessories from Milescraft you could add would be the In-LineClamps, the BenchClamp, or you could create a more robust grid system by utilizing the CrossTrax accessory so your aluminum T-Trax can intersect from maximum clamping power! Woohoo!
Thanks for following along with this tutorial here. Hopefully this was a great experience for you and helps you to build out your shop and your skills, all with a little help from your friends at Milescraft.
Want to see the video tutorial for this project? Watch here!
Additional Resources:
Everything I used from Amazon
Things I used from Lowe’s
This tutorial was provided by Christy Miller, with Oak Hill Millworks. Follow along with Christy for more woodworking and Milescraft content at: www.instagram.com/oakhillmillworks.
SUPPLIES
Tools/Supplies Needed:
Qty 1 – 3/4” sheet of plywood (can almost fit on half sheet if you have scraps)
Qty 4 – 2x4x8 pine
Qty 8 – 3” butt hinges
Qty 4 – 6” strap hinges
Qty 5 – hook and eye latches
Qty 4 – 3” locking swivel casters (optional)
Table Saw or TrackSawGuide™
Drill / Driver
Plunge Router with 3/4” straight bit (optional)
Square150 and/or Square300
CounterBit Set
#8×9/16” Truss head lath fasteners (Qty 32)
#6×3/8” pan phillips head fasteners for T-Trax (Qty 36)
#10×2-1/2” fasteners
3/8” drill bit
3/8” dowel rod
Table Top Accessories:
T-Trax24
AngleStop
CamStops
CamStopsXL
BenchClamp
HoldDown200
MultiStop
Cut List:
Parts A, B, & C are made with 2×4’s:
Part A – Frame Stile – Qty 4 – 31”
Part B – Frame Rail – Qty 4 – 24”
Part C – Fixed Support – Qty 4 – 21”
Parts D, E, & F are made with 3/4” plywood
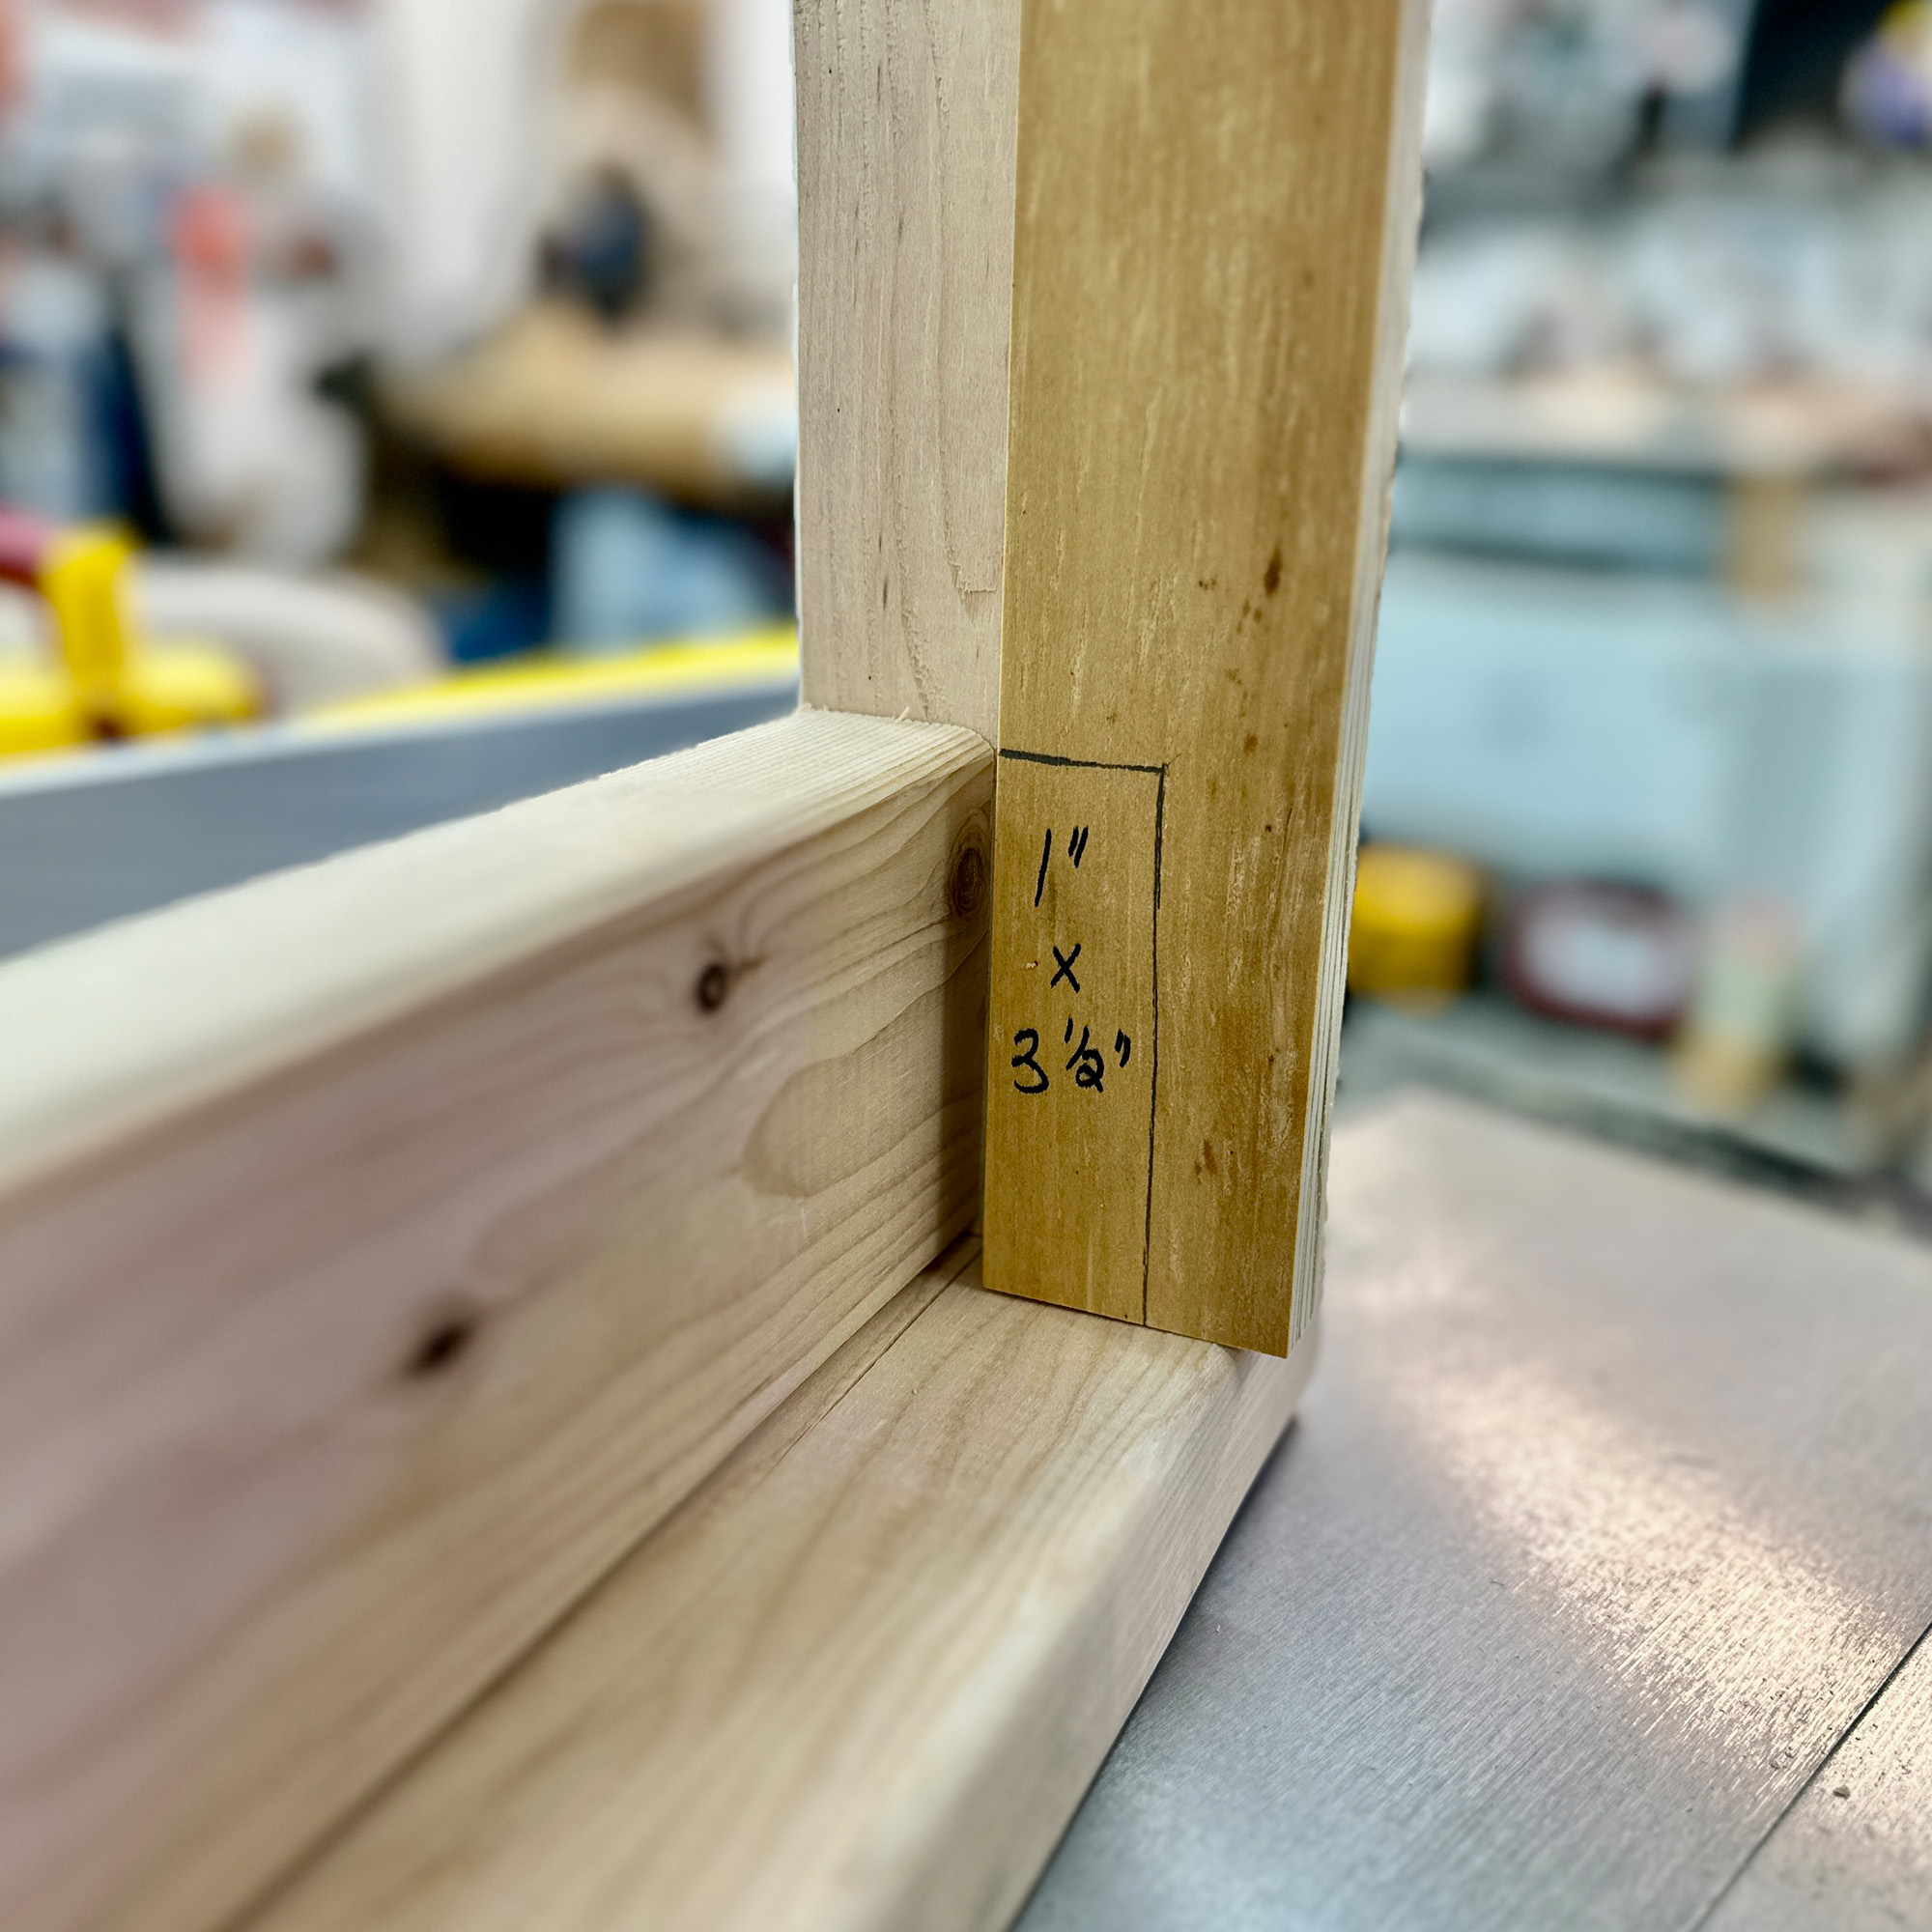
Part D – Hinge Mounting Strip – Qty 4 – 3/4”x2”x31”
Part E – Folding Support Arm – Qty 4 – 3/4”x3-7/8”x19-7/8”
Part F – Folding Support Panel – Qty 2 – 3/4”x16”x19-7/8