
Christy Miller – Oak Hill Millworks

Find the opening of your cabinet or cart and subtract 1/8” for a little wiggle room. This will be your overall drawer width. Then subtract 1.5” to account for the two side pieces (or subtract 22/32 if your plywood is actually only 11/16”) and this will give you the length you need for your drawer front and back pieces. To find the length you need for your side pieces, simply measure how much room you have front to back and shave a little off. This isn’t rocket science — we’re building quick and dirty drawer boxes today! Make it as tall as you’d like! My drawers were about 3.5” tall based on the scrap material I had on hand.

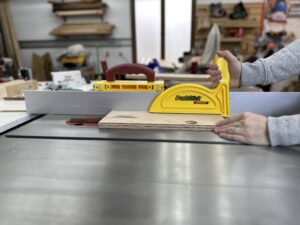
I used my table saw to rip scrap 3/4” plywood down to the width I wanted, which was about 3.5”. Save your off-cut! You’ll see why at the end! The original PushStick™ is narrow and long so it gives good downward pressure to control the cut on your push-through if you prefer to not get your fingers close to the blade. You can see I was using wood I had test-drilled for hinges before — I like a good project made with scraps!
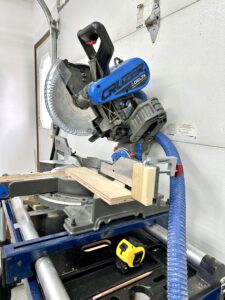
I chose to use my miter saw to cut the drawer box parts to final length. If you’re making a bunch of the same parts on your miter saw, a stop block is a great way to save some time and not have to keep measuring for each cut. Do your first cut and then setup the stop block using that piece as a guide by butting it up against the saw blade and clamping the stop block onto your fence. Depending on the type of cut, trigger clamps can sometimes get in the way of the saw movement so it’s nice to have these FenceClamps™ as another option.

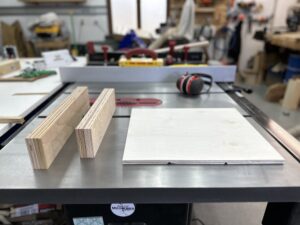
The 1/2” scrap I had available was an odd shape as it was a “whoopsie” from working on the CNC. Admittedly, there’s a messed up carving of a nutcracker on the other side of this plywood but let’s just pretend it isn’t there! I am glad I could save some money by re-purposing it.
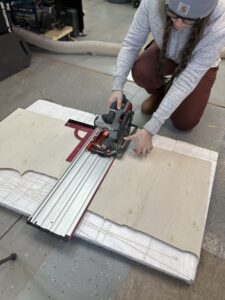
Technically, this entire cut could have been done on the table saw but it is considered unsafe to make a cut on material that is wider than it is long, as it is in this case. I opted to break it down first using my TrackSawGuide™ before heading to the table saw to finish it up. The bottom for this quick and dirty drawer box is simply going to fully cover the bottom and be screwed into place. For that reason, it is easy to size it. It is the overall width of your drawer x the length of your drawer.

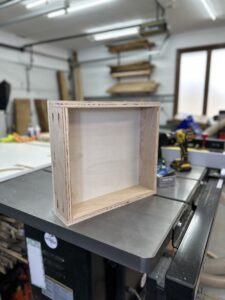
Pocket hole construction is a really solid way to adjoin plywood parts and doesn’t require using glue for an application like this, where we are building drawers for industrious purposes. To me, using 1/2” bottoms and pocket holes on drawer boxes for your workshop means we they will hold up over the years and are easy enough to make.
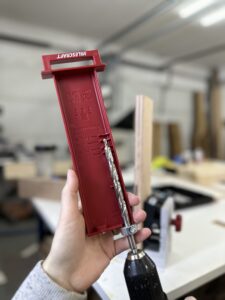
If you are fancy and have the PocketJig400™, it comes with a built in drawer to keep bits and also helps you set your depth collar. The trick here is to keep the collar loosened and on the outside of the measuring device and line up the step of the drill bit (not the tip) with the 3/4” mark since that is the thickness of the material we are drilling into.
The steel toggle clamp with micro-adjust clamp-head allows you to lock your board into place and prepare to drill. Special note here, we are drilling our pocket holes into the front and back drawer parts, not the sides. We do this because of the shearing action that happens when you pull a drawer forward to open it. Having the pocket holes be perpendicular with that pull will make for a sturdier drawer.
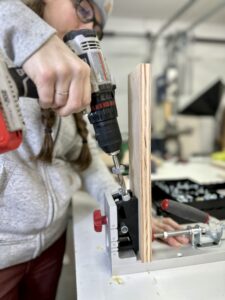
Be sure to adjust the drilling guides to be at the 3/4” setting to match your material thickness. For one drawer, you’ll drill two pocket holes on the ends of both the front and back pieces and call it good! Time to assemble.
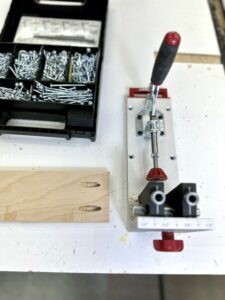

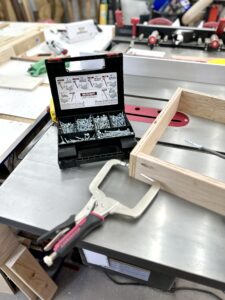
Pocket holes require pocket screws or pan-head screws as well as some finesse. Experienced users can use an impact driver to fasten, but if you are new to assembling with pocket hole screws, I would encourage you to use a regular drill and to possibly adjust your drill’s chuck down to perhaps 10. This will ensure you don’t overdrive your screw and blow out your pocket. For 3/4” soft material like this plywood, 1 1/4” course thread screws should be used.
I like to do this one of two ways: either use a PocketClamp™ like the one shown below, or use a regular woodworking clamp to squeeze from both sides of the drawer box. Either way, you need some sort of resistance because driving the screw into the pocket will make the two pieces of wood want to pull apart and then they will misalign.
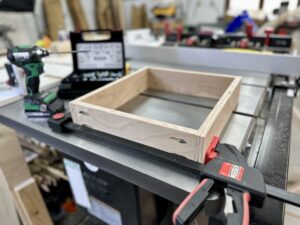
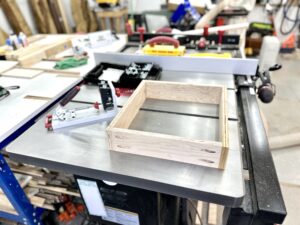
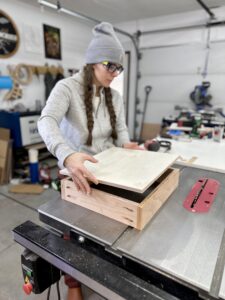
I did not use any wood glue on this project since this style of drawer is meant to be used in a woodworking shop or industrious setting, and the pocket holes are more than enough strength. Attaching the 1/2” plywood on the bottom is as simple as lining it up to be flush with the edges and using whatever screws you have one hand to lock in into place. I did one screw in each corner and one in the middle of on each side.

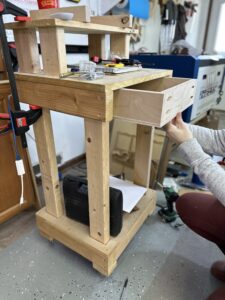
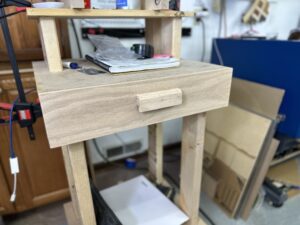
Keeping this very simple so we can all have a quick win and improve our organization without too much work! Here is my existing computer cart:
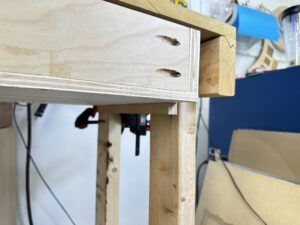
I popped off the front 2×4 that had been there to make room for the drawer. I used the 3/4” plywood material that was actually my off-cut from ripping the drawer parts down to width as the runner. See, I told ya to save it! Mark where you need your runner to be and leave a little extra room above the drawer. I used super glue and some brad nails to secure my rails – easy as pie!
I looked around through my scrap supply and had a nice piece of red oak that looked like it was going to be perfect for a simple drawer front so I simply chopped it down to size to cover the entire front part of the computer cart and then temporarily put it in place using my favorite secret, double-sided tape.
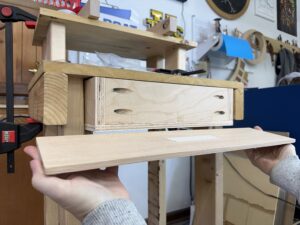
This allows you to get your drawer front where you want it and then you can clamp it on for a little extra insurance while you fasten it into place from the inside of your drawer.
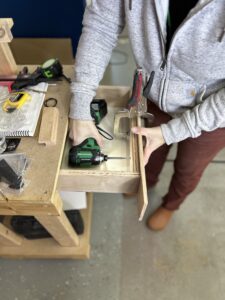
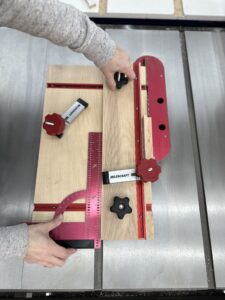
I couldn’t quite stop there and decided I better fashion a quick handle out of more scrap! I found another piece that had been an off-cut from making a frame so it already had a rabbet cut into it, making a perfect little handle grip. It was a little chunky so I put it on my custom made sled that I actually did project plans for (check them out here) so that I could safely shave some off on the table saw.
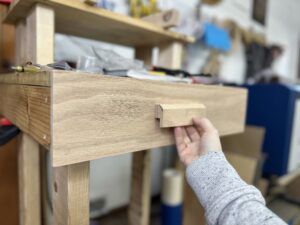
I installed the drawer pull in the same way I installed the drawer front — doublesided tape and then a little measuring and marking on the inside of the drawer to know where to pre-drill and fasten with screws.
Thanks for following along with this tutorial here. Hopefully this was a great experience for you and helps you to build out your shop and your skills, all with a little help from your friends at Milescraft.
Want to see the video tutorial for this project? Watch here!
Additional Resources:
Everything I used from Amazon
Things I used from Lowe’s
This tutorial was provided by Christy Miller, with Oak Hill Millworks. Follow along with Christy for more woodworking and Milescraft content at: www.instagram.com/oakhillmillworks.
